This article describes the basic concepts and the necessary equipment to create own HDRI.
The second part will be provided in the upcoming days and will describe step-by-step instructions on how to create the HDRI.

The concept of HDRI

A theory comes first. HDRI is a panoramic photo, which covers all angles from a single point and contains a large amount of data (usually 32 bits per pixel per channel), which can be used for the illumination of CG scene.

hdri tutorial

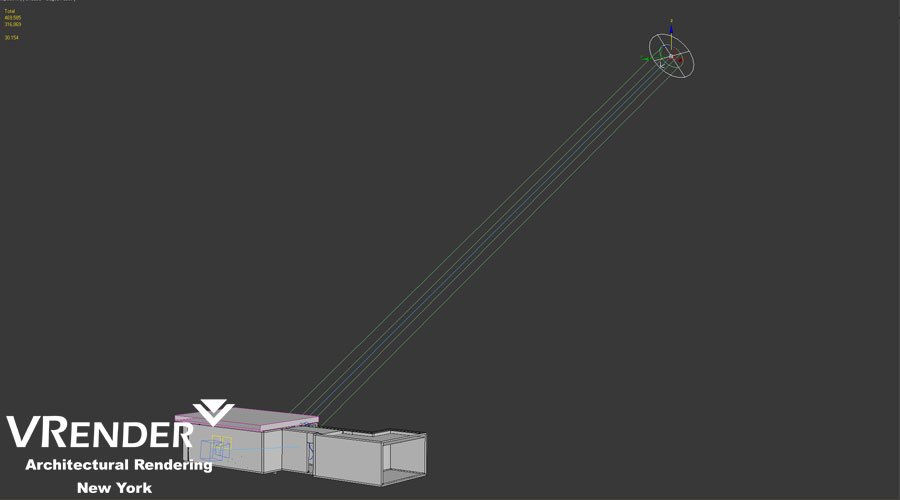
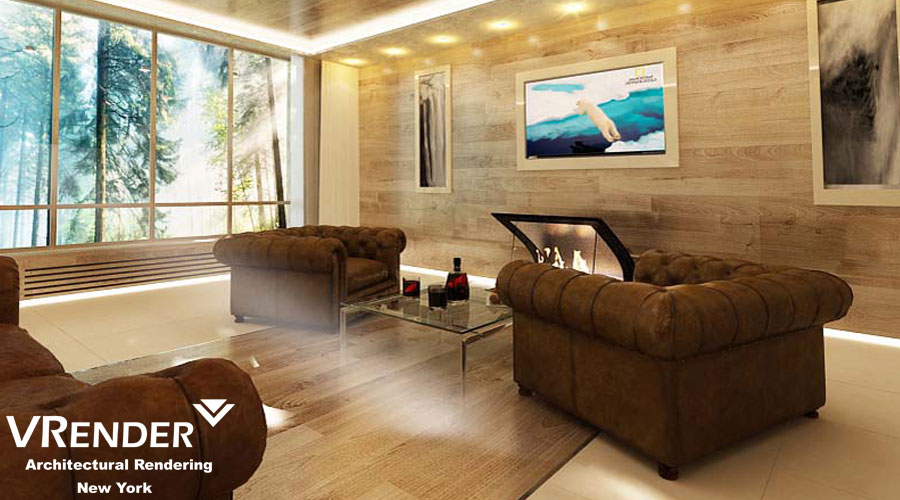
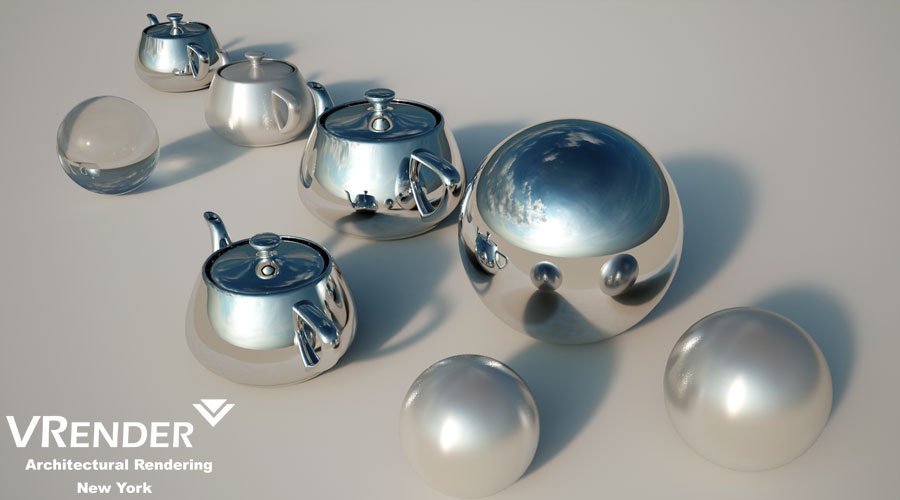
A simple 3D scene, which was lighted only with HDRI:

The easiest way to light a scene in the CG is the use of HDRI. Creating high-quality HDRI from scratch is a difficult task that requires very specific equipment and meticulous attitude to the entire process. One mistake will result in overdo. For example, the use of an incorrect focal distance or a slow shutter speed.
HDRI means High Dynamic Range Image. “Dynamic range” is the amount of data about the brightness of the image; such data is the much larger amount of the information than the human eye is able to catch. I call the most part of the photos and pictures as LDR images or pictures with a low dynamic range. They store 8 bits of data for each of the red, green, and blue channels for each pixel. An example of LDR image is a JPG file. The problem with the LDR image that it is limited to a relatively small range of luminance values from 0 to 255, which is insufficient for the illumination in 3D. Therefore, you need to choose the HDR format.

All we need to do is play with the brightness to illustrate the difference between JPG and HDR file

hdri tutorial 3ds max

As you can see, JPG on the left has absolutely no details in the bright areas. The entire rectangle is a solid color. This is because the maximum brightness of the pixel in the JPG image is 255. The maximum brightness in HDRI is practically infinite that simulates the fluorescent lamps, so they remain visible even if the image is darkened. HDR file retains the brightness of bulb correctly. It knows that the lamp’s light is much brighter than the rectangular area around it, but it is only one solid color in the JPG’s version. This means that when you use the image to light up the 3D scenes, the lamp will emit more light.

Here’s a simple scene, illuminated by a JPG and HDRI:

original hdri ligth  original sky ligth
As you can see, JPG gives flat and unrealistic lighting, while HDRI gives good sharp shadows and lots of juicy contrast, as from the bright fluorescent lights.
The difference is even more apparent when we use an example that has even more bright light source like the sun:

sky hdri map  hdri sky map

You can see in the chrome ball on the back side of that JPG and HDRI appear to be identical, but the light they create is totally different due to the fact that the HDR file stores the correct brightness of the sun and JPG is limited to a range of up to 255 colors, which is too low to provide enough lighting.
You also need to debunk the myth with the understanding of HDR pictures.

HDR photo, not the HDRI map

HDR is a type of image that is best described as ‘tonal image.’ The idea is to take a few photos with different exposures, and put them together so that all of the images are properly displayed in terms of brightness (not too bright and not too dark). For example, the sky is usually much brighter than the rest of the image; therefore toning program will choose to use a darker exposure for the sky and a brighter exposure for the rest of the scene to balance it. The result is an 8-bit image, where you can see many details that may be lost in conventional photography.
The process is very similar to how you would do HDRI – you’re doing a bunch of photos with different exposures, and glue them together into one image later. The difference is that the tonal image’s goal is to make conventional JPG, which looks more detailed while with HDRI – is to make a 32-bit image, which stores many data about the brightness (and hence gives a realistic light in the 3D scene).
True HDRI will be in a format that can contain many data (HDR/EXR/TIFF). It will look just like any other image, until you adjust the exposure, and discover that it secretly stores much more vivid colors than you could see before.

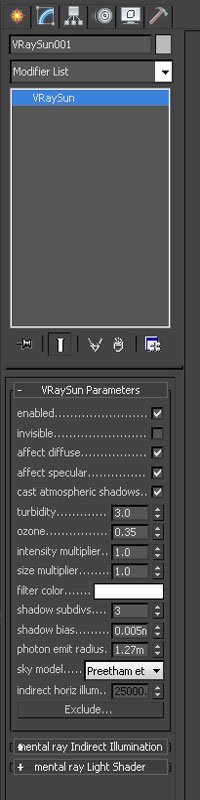
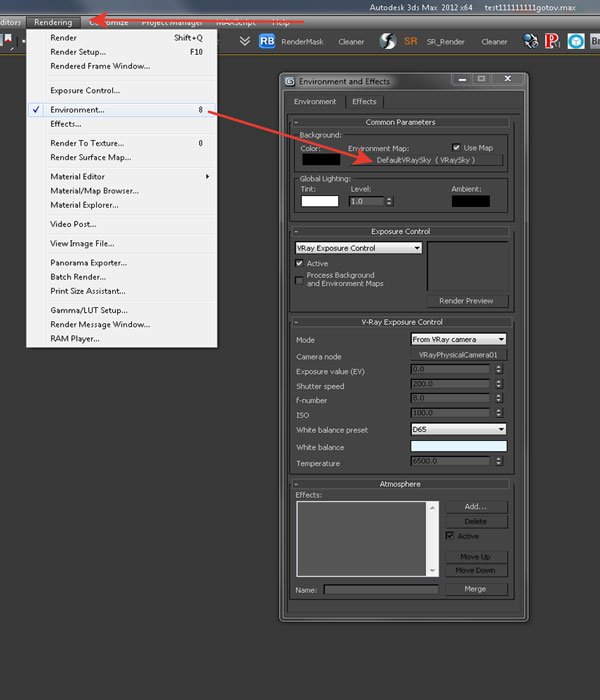
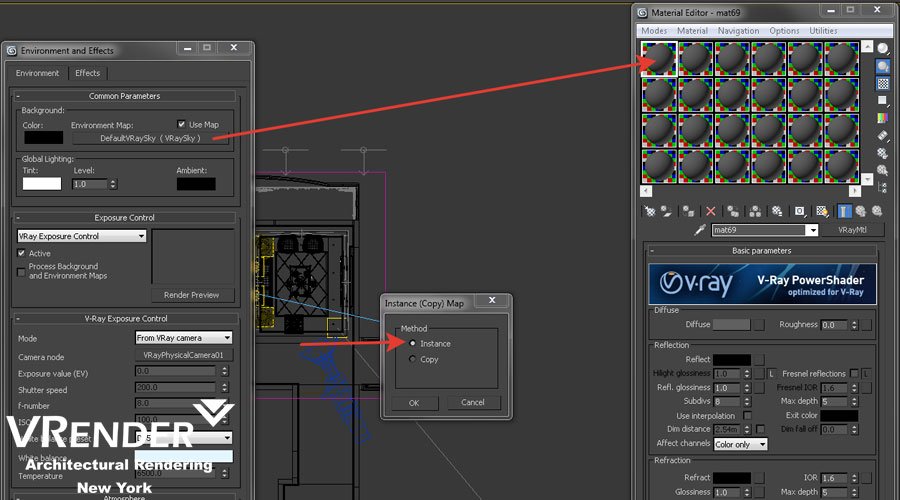
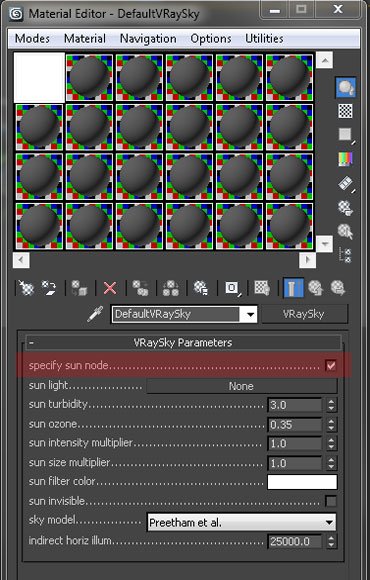
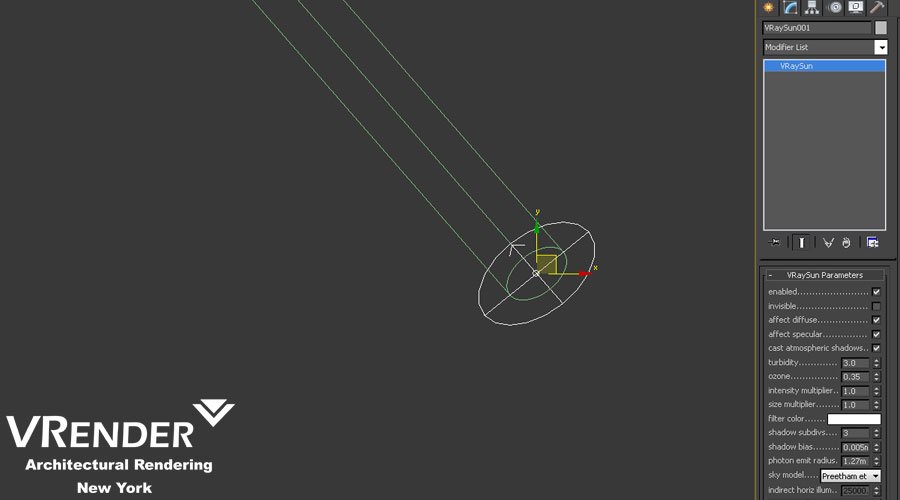
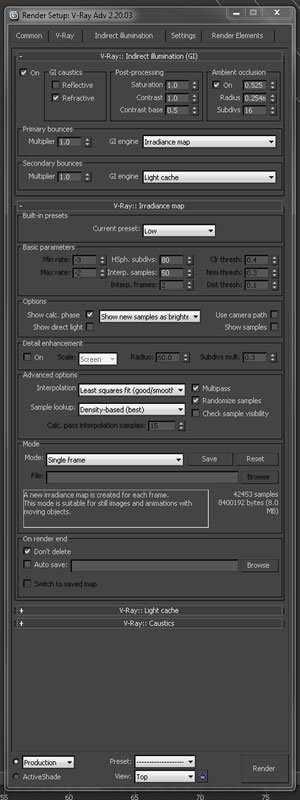
a few lessons on setup HDRI lighting in 3DS Max and V-ray

Vray HDRI tutorial in 3ds Max

Studio lighting with HDRI

Download V- ray HDRI Scene with settings

Vrender  Company 2016.

3D animation is widely used in various fields, not only during the creation of fantasy films or video games. This article describes some areas where there is work for the 3D animator. Perhaps, this material will give you some ideas about the life changes and help you find a dream job.
3D software and equipment are used in various industries and fields of activity. In every area, 3D animation is used in a completely different way. Consequently, objectives and approaches to its implementation vary.

Science and entertainment are the primary consumers of 3D animation and visualization. Science embraces highly specialized projects aimed at visualizing some scientific processes. For example, 3D animation is used in physics, medicine, and forensics. In the film and game industries, 3D animation is used to create characters, model the scenes, create futuristic or historical worlds and special effects. This is a different industry, which employs thousands of 3D specialists.

3D animation in the film industry

The film industry is the largest industry, which uses 3D animation. Movies can be made entirely in 3D (as Shrek or Toy Story) and 3D visual effects (like Jurassic Park or Tron: Legacy).

Typically, film production takes from 6 months to 4 years, and the project employs from 3 to 300 specialists.
Production of fully animated feature films takes longer, 2 to 4 years. Studios with a staff of several hundred specialists work on the projects on their own.
One person or a small studio usually creates short films lasting up to 40 minutes. The significant studios typically check the new technologies on short films.
Movies with visual effects are different from fully animated ones. They are shot inside the pavilion, and captured images come to the hands of the masters of visual effects, who add the necessary effects and elements.
The studios, which work on the visual effects, can be small or large depending on the type and scope of performed work.

3D animation on TV

Like in the film industry, there are several television products, which are fully animated. However, creating such programs for television is a costly and lengthy process. For example, the American children’s show Mickey Mouse Clubhouse was produced entirely in 3D programs.

The TV is increasingly using 3D animation and visualization to complement the broadcasts with effects or create trailers.
On the Discovery Channel, History Channel, Health, and Science, 3D animation is used for educational purposes. Short television programs help the audience to discover something new.

Television does not have such large budgets and long timeframes as the film industry. The television programs are shot and edited in hours, days, or weeks, not in years, but the 3D animation should also look good.


Video and 3D

Profit from video game production is significant, and it is the hundreds of thousands and sometimes millions of dollars. In profitability, video games can compete only with the film industry. The 3D animation is used to create game worlds, in which the player gets. Video games are close to the film industry, and only 3D designers work much faster. Mobile games are developed rapidly, but video production can take 2 to 3 years. Creating all the characters of the game world is a time-consuming process but very exciting. Typically, the production of 3D characters and game environments is a work for people who are headlong in love with their work and are capable of doing what they like for hours and days. This is a great profession, and it is very well paid, but the competition is perhaps the highest.

3D Animation in advertising

3d animation in advertising

The advertising industry perceives new opportunities quickly that allow it to attract the audience’s attention and additional influence. The human eye very positively perceives a 3D animation, and its efficiency is five times higher than the advertising made in 2D animation. Sometimes the use of 3D animation is the only possibility for visualization. 3D animation gives marketers more opportunities to show the advantages of the product.
The advertising industry uses short animation: 10 seconds up to 5 minutes. This time is enough to show all the benefits of the product/service and to give all details. However, commercials often carry a large amount of information because airtime is costly. Like a movie or a television program, a promotional video can be fully animated or contain the added visual effects in the footage. Advertising requires a very high-quality animation, but at the same time, the customer gives a little time to create a video that makes the task even more enjoyable.

3D animation in VR

Virtual Reality is a new direction in the content world, gaining new users’ hearts every day. Currently, this area is one of the fastest-growing in IT. Of course, now the devices and VR technology are still far from ideal. Now and then, the processor or graphics card slows down, as well as the sensors do not always respond to the user’s movements. That is why we still cannot give up the joysticks. But the VR sphere is increasing, and our gadgets are becoming more and more powerful each year. Any modern smartphone supports VR technology using 3D boxes with ease and without delay. Virtual tours and 5D-cinema with short videos have become part of our lives.

Health and 3D animation

The results of the work of a 3D designer made for scientific purposes are rarely seen by the mass audience. Medicine, criminology, and architecture are the specializations that 3D animators have.
3D animation is widely used in medicine: from imaging of medical events to a biological response. For example, it is challenging to reproduce how the disease blocks blood flow to the heart and causes a heart attack. 3D animation allows to recreate the picture visually of what is happening, and it is a considerable advantage for medicine. In addition, 3D visualization is increasingly used in educational processes and marketing.
It is also used during the researches, helping to make predictions and diagnoses.
3D visualization and animation in medicine is a rapidly growing market. It can bring significant profit to 3D animators who work freelance or in small studios.
But the problem is that 3D professionals want to work in the gaming or movie industry much more than to work with pharmaceutical companies or for university studies.

3D in criminology

3D animation and modeling help in the reconstruction of events in criminology. Animation & models are created to prove or disprove the complete picture of a crime or an accident. 3D models and animation are not direct evidence, but they allow the investigator, judge, or prosecutor to reproduce the event and demonstrate the course of events.
Sometimes forensics needs to recreate some of the missing items or fragments related to the crime, and in this way, they are helped by new technologies: 3D modeling and 3D printers. The scope is quite specific and requires additional knowledge.

Architecture and 3D animation

architecture and 3d animation

3D modeling allows interior designers and architects to visualize objects and interiors and test colors, textures, placement of architectural elements, and decor items. The scope is relatively narrow, but you can collaborate with designers, architectural firms or architectural offices, marketing departments of enormous construction companies if you wish.
This article lists only a few areas where the work of a 3D animator may be helpful and paid. There are far more areas of 3D design where you can try your hand to become successful and build a new career.

Most popular 3D Animation software –  Autodesk Maya, Autodesk 3dsMax, Adobe Premiere, and Adobe AfterEffects.

Vrender  Company 2016.

interior using vraysun

The lighting of the interior using VRaySun and VRaySky

We shall consider the option of lighting of the room using VRaySun in this lesson.
You must perform these settings to use the VRaySun interior lighting technique.
The method is convenient because it is possible to create high quality interior lighting relatively fast, as well as to have the effect of falling sunlight.
So, after you have configured V-Ray, we need to add the sun itself to the finished scene. We do it this way:
Create – Lights – Vray – VraySun

lighting of the room

Once the sun was added, we need to agree that VRay adds own VRaySky map on the environment’s map.

add vraysky to editor
We set the angle of inclination of sun optimally, so it would shine nicely in our room. By the way, the rays color depends on the angle of the sun. The closer the sun is to the horizon, the redder light from the sun will be.

vray sun setup

Once we have set the angle of inclination of the sun, we need to perform the following operation: to open the Environment window as it is shown on the following screenshot, where we can see that the environment map is set as VraySky.

environment map is set as VraySun

VraySun lighting consists of two components: Sun and Sky. Now we have to separate these 2 components and to manage them separately from each other. That will allow us to adjust the room lighting correctly to your liking, as well as the brightness of daylight and the intensity of the sun’s rays. To do this, we open the materials panel, and drag the VraySky lighting map there. After this, we are able to change the settings of daylight. Be sure to selects Instance copy type when you copying. Otherwise, we would have to change the settings without this parameter. But they will not be applied, as we do not do duplicate, but make a separate copy of our VraySky.
We do this it this way:

setup interior lighting

Next, we need to turn on the Manual Sun Node parameter.

manual sun node
This turning on will separate the management between sun and sky.
Further, in the Sun Intensity multiplier parameter, we adjust the desirable value. It can be different for each scene, but usually this parameter is not greater than 0.1. It is best to choose it according to your situation.

Once we set up the sky, you can do a couple of trial renders to adjust the brightness of the lighting. After setting up the optimal lighting of the room, you can correct the parameters of the falling sun rays. Sometimes they are either dim or too bright, leaving a white spot. This can be adjusted in the sun setting, changing the brightness, by shifting the settings of Intensity multiplier parameter.

configured v-ray

Then you can do a couple of test renders to configure the optimal lighting of the room.
Sometimes the sky gives a blue tint, and colors the room in blue. It is possible to correct it by decreasing parameter’s value in render settings. The lower the Saturation (Rendering-Render Setup- Indirect Illumination Settings – Saturation) value will be – the less the sky affects the color of lighting in the room, but also the less objects located in the room affect it, so do not do this option’s value too small.

Add VRayLight (Create – Light – Vray- VRayLight) behind the windows with the following parameters

vraysun lighting consists

V-ray Indirect Illumination Settings

environment map

After all the settings are applied, you can receive something like this:

interior tutorial final

After Photoshop Post Production

Photoshop Post Production render

Vrender rendering company servicesDownload V-ray Interior Scene Tutorial Example

Vrender  Company 2016.

Many of us have seen realistic images of houses, cottages, gardens, which show in detail how nice it all looks from different angles.

Here are a few examples.

realistic images of houses

profession of 3d visualizer

In fact, these are not photos. They are just the ideas of designers and architects who work out the development plan. Yes, it is not built yet, but the designer has already embodied the idea in a visual image on which the happy owner of the real estate is able to assess how things will look like, and make adjustments, if applicable. That is, exterior visualizer is the person who creates a photorealistic image based on the given plan of development.

Here many readers might have a natural question – this is, probably, a sort of very creative profession, which has to be studied for years in institutions? Yes, this work is a creative one, because you need not only to create a scene, but also to give realism to it. On the other hand – the work on specific task forces to follow a predetermined plan that makes everything much easier.

With regard to study, we’ll talk about it a little later. We would like to say that it’s not so terrible and expensive, as it seems, but available.

photorealistic image

How much can you earn by doing visualization of exteriors?

This is the second natural question that arises before you decide whether to spend time exploring a new field for yourself. This can be answered simply – the construction field is expensive in general. If you require for designer services, the services of visualizer are also needed – picture can tell a person much more than a thousand words and plans. This means that the exterior visualization services aren’t cheap, which means that this can be quite a good work for earning for living.

For example, work on a simple building, which takes a couple of days, can cost 10 thousand roubles and more. The more complex the project is, and the more images are required from different angles, the more expensive the work will be. Thus, even a novice with a serious approach to the work may earn 50 thousand roubles in a month and more.

Experienced professionals, whom every novice will become sooner or later, have monthly income of more than 100 thousands and this is common thing. Would you agree that this is quite decent payment? Especially if you do not have to leave the house to do this work, and it is enough to have only a computer.

What do you need to start studying a profession of visualizer?

It’s simple – you need to have 3 things only:

1. A computer, powerful enough to work with 3D Max program. Most part of home computers, capable to cope with modern games-shooters, having 4 GB RAM, are suitable at the initial stage.

2. The desire and perseverance – this must be named the principal thing. Nothing will work out if to treat work carelessly and especially, if you do not practice. Anyone who treats work seriously, reach success – this is the fact of life.

3. Teacher – you need to have sufficiently experienced specialist, who will teach you all the details of 3D visualization. It is desirable to have the opportunity to ask questions, which the beginner always has many.

If the first and second points make more or less clearance and are solved on your own, the third is bit more complicated. Reading books, video tutorials and learning courses on modeling in 3D Max – they are nearly useless, as they will give a lot of theory, but little clearer in terms of actual 3D visualization of exteriors. Therefore, we will provide you with links to video tutorials on this topic from the two very known visualizers. If you learn, do it from the best!

Vrender  Company 2016.

Rendering Resolution Images

Vrender rendering company servicesRendering High Resolution Images In 3ds Max

Paper Size                   DPI         Image Size (WxH)

A4 – 297x210mm     300dpi     3507 x 2480 (standard)
A3 – 420x297mm      300dpi       4960 x 3507 (hi-res)
A2 – 594x420mm      300dpi       7013 x 4960 (ultra)
A1 – 841x594mm      300dpi       9933  x 7015
A0 – 1189x841mm    300dpi       14043 x 9933


3D Rendering Image Resolution Examples

1. Ultra High Resolution Image 4000 x 1100 px (image compressed and optimized for web)

ultra hd rendering

2. High Resolution Image 2500 x 1400 px

visualization 3d company

3. Low Resolution Image 900 x 500 px

real estate rendering service

Generally, render out at 2000×1500 px. this is pretty good for most sizes.

This is quoted from Jeff Mottle in a previous post –

Basically, when you are printing/rendering an image you have three variables to consider:

1. DPI/PPI (Dots per Inch/Pixels per Inch) Both are the same thing and are also known as resolution.

2. Pixel size – measured in pixels (this is normally what you render to how monitors are measured).

3. Print size – measured in inches (can be anything but I’ll use inches for convenience)

1. DPI/PPI

First, you need to know what resolution your printer can handle. Some will say that they go to 1200 dpi or 600 dpi, but in practice, you should never need to go bigger than 300 dpi, even if you are printing a 60 ft wide billboard. Just like the digital camera’s non-optical zoom abilities, printers use DPI to claim superiority in the industry.

DPI is the number of dots of ink that are put down by your printer onto a page over a one-inch line. The amount of resolution that a printer can archive is based upon how close together the print head elements or jets are positioned. Of course it is a bit different with a 4 color press, but for now I’ll just leave it at that. You may also notice that your inkjet will say that the vertical resolution will is different than the horizontal resolution. This is because in one axis the printer is relying on the proximity of the jets to each other, whereas the other direction is related to the sensitivity of the rollers that are feeding the paper across the jets.

2. Pixel Size

I’m assuming that everyone is pretty familiar with pixel size as we deal with is on a daily basis. However, don’t assume that your print house will be, because in many cases they are not. You will usually need to give them an image size in inches based upon the resolution that their printer is capable of. Don’t try to explain it to them because they just won’t get it.

Pixels are something that your monitor uses to describe the very small square dots (pixels) of light that are lit up by the guns of your CRT. (LCDs are different) Typically we say that a monitor is 72dpi.
A pixel translated to a page is usually represented by many dots of ink depending upon the print resolution.

3. Print Size

This one is pretty self-explanatory and is the image size on the page that your printer printed.

So you know what each one is but how do they relate to one another? As I mentioned earlier there are thee variables in this equation. To get one you must have the other two, so here are the possibilities:

For these examples let’s assume that our printer is capable of 300dpi I am going to print an 8 x 10 image and my rendered pixel size is 3000 x 2400

You have Pixel Size and DPI and want image size:

This is useful when you want to know how big an image will print on your page if you do not allow the printer to scale the image at print time. (ie scale to fit).

===========================

Image Width = Pixel Width / DPI

Image Width = 3000 pixels / 300DPI

Image Width = 10 Inches

Image Height = Pixel Height / DPI

Image Height = 2400 pixel / 300 DPI

Image Height = 8 Inches

You have Pixel Size and Inches and want DPI

This one is not all that useful and I can’t think of any reason to use it practically but here is it anyway.
========================================

Horizontal DPI = Pixel Size (Width) / Inches (Width)

Horz. DPI = 3000 pixels /10 inches

Horz. DPI = 300DPI

You can use the same equation for the Vertical DPI as well. Some printer are the same resolution in both axes.

You have Inches and DPI need pixels

This one is useful when you know that your printer can print 300dpi and you would like to print an image that is 8 x 10 and need to know how big to render your final image to do this. Of course, you could always render it bigger, but rendering time is precious so you never want to render more pixels than you have to.

=======================================

Pixel Width = DPI x inches (Width)

Pixel Width = 300 DPI x 10 inches

Pixel Width = 3000 pixel wide

Again the same formula can be used for pixel Height as well.

So now you know what each variable is and how they relate to one another. The biggest hurdle I suspect is how they relate to one another visually, but that will have to wait for my PDF document.

Hopefully this helps some of you and does not confuse you even more. Even if you do not fully understand the why yet, you will at least have the formulas so you are know-how.

From http://forums.cgarchitect.com/28-render-quality-size.html


Vrender  Company 2016.

In order to recreate the models of the future houses and apartments, which have not yet exist in the reality, such popular service as 3D rendering of a house or apartment is increasingly being used today. As the result of usage of special programs to create the three-dimensional model of the housing, there arises a specific idea about future look, in the smallest details. The resulting model can later be used for making a wide variety of documents and cost estimates.

hd render

A popular service of apartment’s 3D visualization helps to save a lot of money, because customers will not have to pay on each individual stage: it is real to reduce the possibility of making architectural, engineering, and design mistakes. Thanks to modern simulation, you will see the real model of the future housing. For the contractors, it will be very difficult to make a bad work, and the control over everything will be greatly facilitated.

3D visualization of apartments

At the time of the creation of the future three-dimensional projects, a variety of schemes, drawings, sketches and photos can be applied. Visualization projects can include not only residential, but also the surrounding area, for example, to create a common picture of house with a site. 3D visualization of an apartment or house can be created based on existing projects, but it is better to make your own project from the start, as this option helps to create your dream house.

1. Creating the most accurate models of residential buildings and adjacent territories.
2. Full implementation of all plans of architects and designers: the model fully transmits all walls, roof, and windows, according to the future sizes and configurations.
3. The transfer of colors and textures of property that does not allow missing even the smallest detail of the developing interior.
4. Full fitting of a residential building into environment that offers the opportunity to see how your future house and the surrounding landscape will look like.
5. Development of a unique video with 360 degrees overview, and a possibility to move to any point of the intended object.

apartment’s 3D visualization

Stages of 3D visualization of apartment

3D visualization of apartment or house begins to be carried out only after the client selects the general style and size of property.
• First step is creation of a general layout of the room in a flat first, and then in three dimensions:

– determining the size of rooms, windows, ceiling height, and others.
– development of technical details: communications, wiring, lighting and equipment;
– determining the façade of the cottage or home.

• The second phase of a 3D visualization of a cottage is picking up the furniture, pillows, curtains, appliances, electric outlets, cameras, lamps, sockets, sensors, switches and other components in the flat drawing and then in three-dimensional form.

• Third stage is consideration of additional customer requirements and making adjustments.

• The last step: preparation of documentation that will be required during planning of work by engineers and builders.

As a result of 3D visualization of cottage, you will not need to keep in mind all the small details, because the finished three-dimensional image will help to take into account all the details of future housing as accurately as possible, to represent to client his project and to save a lot of money. With this approach, the client is not only able to save own time, but also will get rid of the unexpected errors.

Stages of 3D visualization

Creating projects of 3D visualization of the house should be performed by specialists, who are Vrender. They are professional visualizers, designers and 3D animators with more than 4 years of extensive experience. The presence of render farm in these professionals offers the opportunity to reduce the deadline for the creation of visualizations and to increase the speed of delivery of a quality project. Ordering the service is possible on the company’s website.

Vrender  Company 2016.