Vray Tips
Vray tips before you start to learn Vray
 1. “Correct” geometry
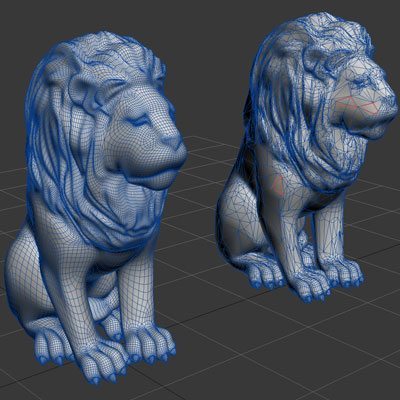
It is necessary to stick to some rules in the process of modeling in order that your rendering scene took less time and you received better results. Otherwise, you may face a number of challenges like undesirable artifacts in the final image.
Use the smallest possible number of polygons. Every extra polygon increases the file size of the scene, wastes the RAM and video card resources to its display, and requires more time to render the scene.

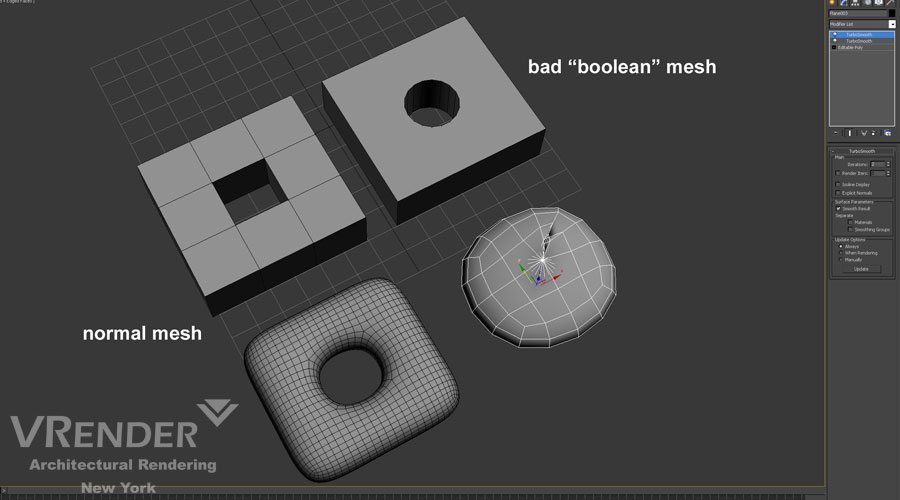
Polygons’ structure must be “correct”. Ideally, all polygons must be squares. This result in following: do not use the standard “boolean” object, because after its application you receive many polygons-triangles with very sharp angle.
There should be no open edges. If the geometry is not closed, i.e., the net contains holes, Vray will take into account the internal space when calculating lighting, which will increase the rendering time. There will also be dark spaces in the grid gaps (shadows).
Polygons must not overlap or coincide with each other, as Vray does not understand which of the polygons are considered basic and should be colored and which must be put on the background. As a result, it mixes colors (materials) of both (all) grounds with an unpredictable result.
If possible, use single objects. Vray more accurately calculates the shadows in places of fracture of grounds if these grounds belong to the same object, and all the vertices are weld.
Convert all the geometry in the editable poly. Get rid of the long hierarchies of modifiers. Each modifier uses memory, and therefore increases the time spent on rendering and calculating the result of the geometry’s change and display of totals and time for rendering.
2. Proper lighting
Always try to use systems of physical lighting, close to the real one, such as Daylight System (system of day lighting), as well as a bunch of VRaySun and VRaySky. Use HDRI to simulate immersion of objects in the environment, as the light sources in interiors use photometric with IES profiles. This will add realism to the scene, as in this case, the actual algorithms for calculating the light information will be used during rendering. Don’t forget about the gamma correction of the image! When gamma is equal to 2.2, colors in 3ds Max will be displayed correctly.
3. Textures
The texture size must correspond to the size of the model on final rendering. Use the textures with higher resolution only if you paint the big picture with a close-up. If the texture is assigned to the small object at the background, it may be small.
If possible, use one texture for different materials, changing its in color and tone as required, in the Output tab.
When using a large number of high-resolution textures, your scene can be very slow and rendered long. In the worst case, Vray can just give up to paint it.
To enhance the realism, Bump maps (with irregularities) and Specular (mirror reflections) must be added to materials, because in reality, each object has its relief and reflectivity. There will not be a problem to create these cards from the original texture – superficial knowledge of Adobe Photoshop will be enough.
4. The scale of the scene
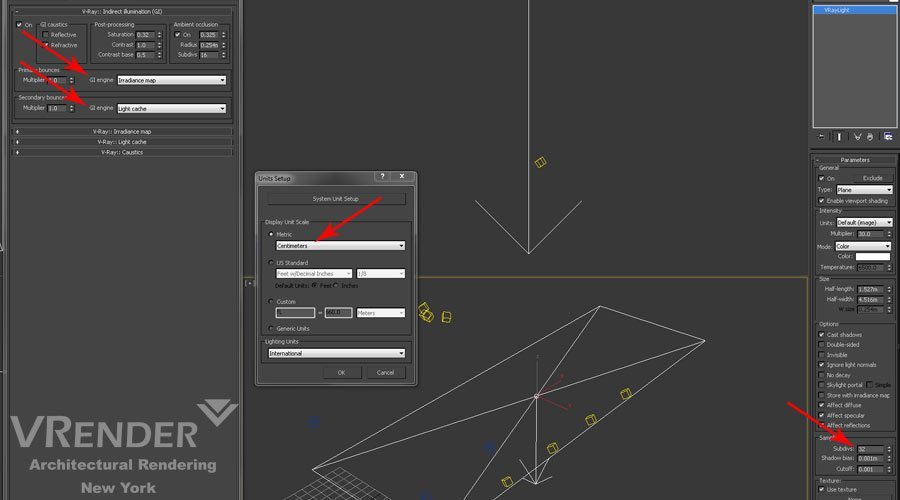
To receive renderings of decent quality, scale units in the scene are of paramount importance. Most often, the work in centimeters is the best solution. This allows not only creating more accurate models, but also helps in calculating the lighting and reflections.
5. Visualization options
To calculate the Indirect Illumination, use a bunch of Irradiance Map + Light Cache. This is much faster than using a bunch of Irradiance Map + Brute Force (set by default). The resulting image is less “noisy” and is painted much faster, if in the light sources of VrayLight type are selected with “Store with Irradiance Map” option.
Good shadow quality can be achieved by setting the number of sub-divs in VRay’s lights settings to 15-25. In addition, always use VRay physical camera, with the help of which you can receive the full control over the presentation of light on the scene.
© Copyright Vrender.com 2016.
- How to add perspective to architectural projects with digital 3D rendering help - December 24, 2023
- 3D Architectural Walkthrough Animation Services New York - April 24, 2019
- 3D Rendering Services in San Francisco, California - March 12, 2019