Vray 3.0 Interface : Explained
In this tutorial, we go about explaining every single Chaos Group V-ray 3.0 setting in detail. With this tutorial you will have a much great understand of the V-ray rendering engine. Its a great read for beginner and pros alike!
If you are having trouble configuring V-ray, optimizing your V-ray render times, or have a huge scene where the render time is just taking too long, then have a look at this free tutorial :
Lets get started!
If you just received Vray or are new to max, remember you need to set Vray as the current renderer before you can access its settings.
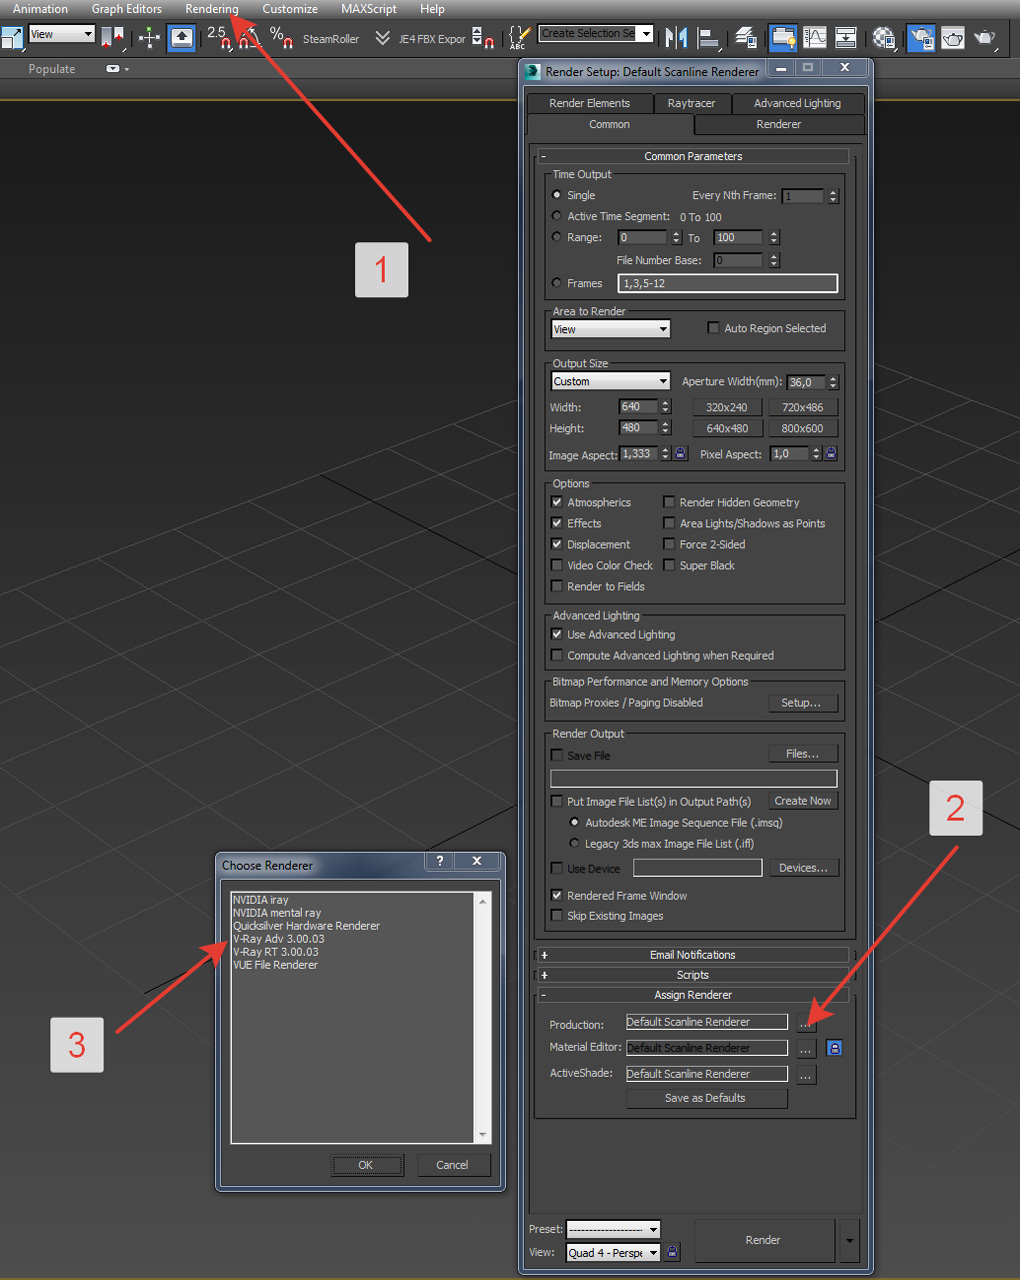
1. Open the render scene dialog box.
2. Expand the Assign Renderer rollout.
3. Click the box for the Production render shown in red.
4. Select Vray from the list.
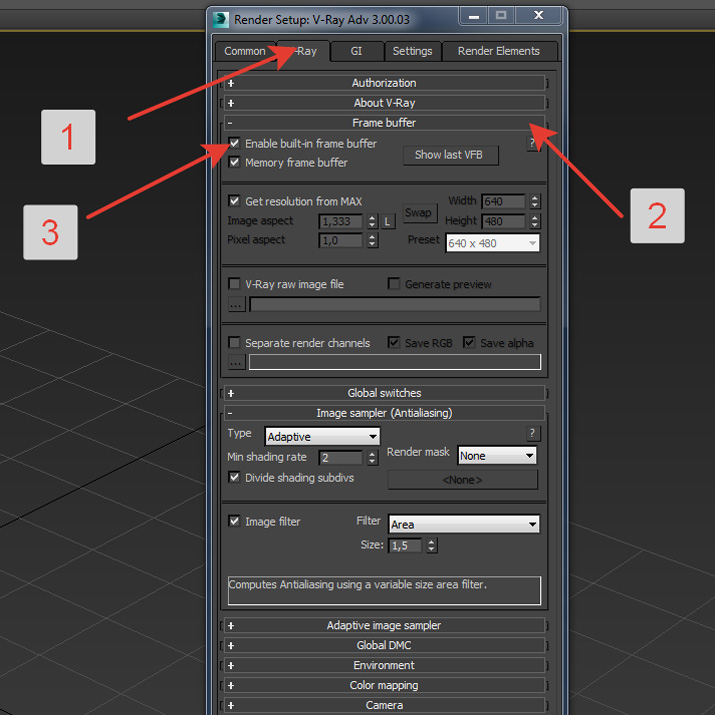
VRAY Frame Buffer
The Vray frame buffer is a cool feature of Vray. Basically it allows you to render your images in a different window other than the default rendered frame window of 3DS MAX. Also it has some features that the rendered frame window does not.
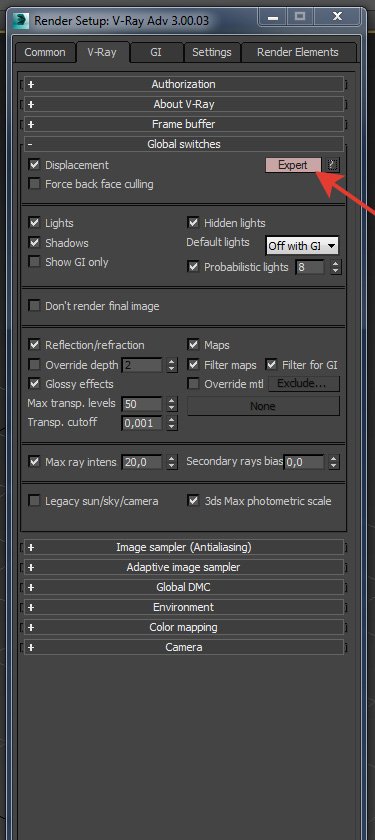
VRAY Global Switches
Lots of important things here. By checking or un-checking the boxes you can easily enable or disable many of Vray’s key features.
Note: I often use this section to globally control displacement, lighting and the override material.
To assign an override material simply drag a Vray material into the box that says None.
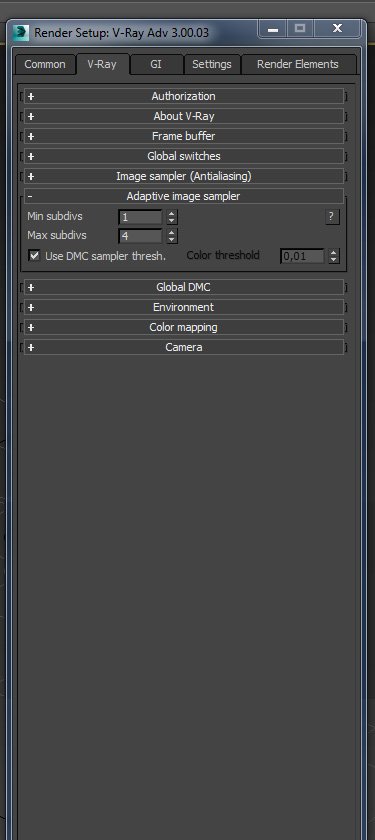
VRAY Image Sampler
Here you can choose the type of Image Sampler as well as the type of anti-aliasing filter.
Note: For the most part I use the default settings here (Adaptive Subdivision with area filter)
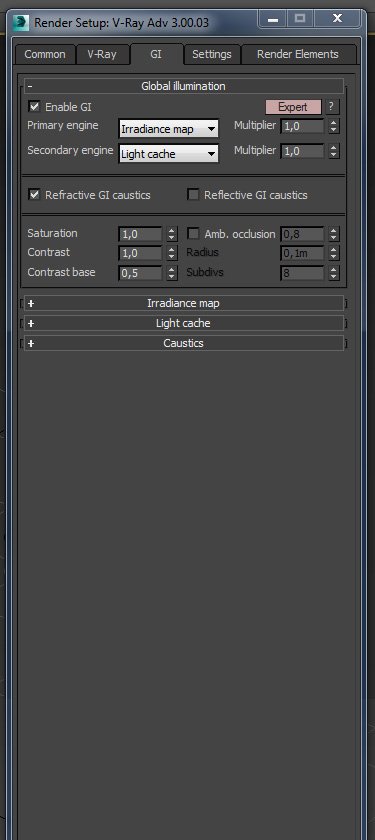
Vray Global Illumination (GI)
This is where all the magic happens. I typically will use the default Irradiance Map (IR Map) for primary bounces and light Cache for secondary bounces.
Notice you also have some options for post processing and GI caustics.
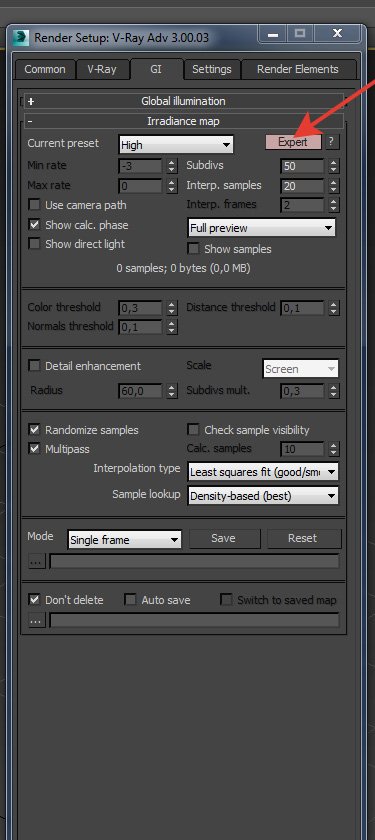
Vray Irradiance Map (IR MAP)
The IR map is one of the methods VRAY uses to calculate global illumination. You can pick from any of the pre-defined presets or manually enter settings for a custon IR map.
Suggested IR map settings
Test Renders:
Min Rate: -5
Max Rate: -3
HSph subdivs: 30
Interp samples: 25
Production Renders:
High preset is usually good enough for me usually.
Mode: For stills, single frame is fine but for animations, Add to current map or Incremental add to current map works well and speeds up the IR map calculation.
Under options I like to have show calc phase checked just so I can visually see the IR map calculation.
Note: If you plan to not use an IR map in your GI calculation, these settings wil not be available. For example if you have QMC for primary and Light cache for secondary, this rollout will be replace with a QMC settings rollout followed by a LC settings rollout.
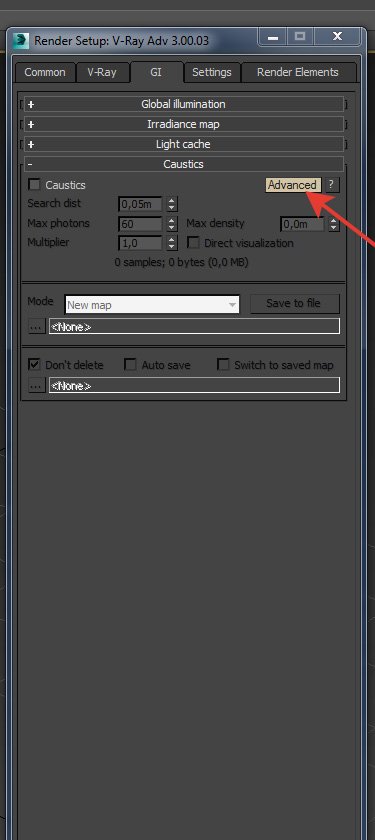
VRAY Caustics
Use this area to control the VRAY caustics in your scene.
Caustics In optics, a caustic is the envelope of light rays reflected or refracted by a curved surface or object, or the projection of that envelope of rays on another surface.

VRAY Environment
This is definitely an important rollout. It your environment is to high it can cause your scene to look washed out. Too low can cause it to look dull. I find that .3 works well in most cases of course that all depends on your scene.
Note: Environment light does not pass though geometry unless the geometry is transparent.
If you want to use HDRI lighting simply drag the V-ray HDRI from the material editor into the open slots (none buttons)

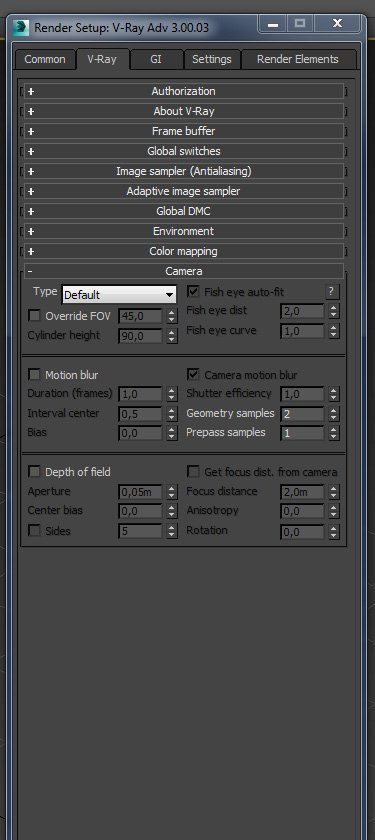
Vray Camera
Here you have global control over all the V-ray settings.
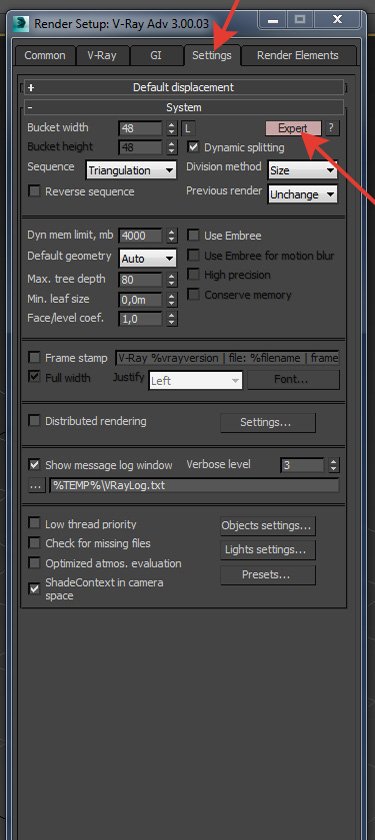
Vray System
There are lots of useful options in this rollout. For the most part I stick with the default settings.
Notable Settings:
Render region division: changes the bucket size. (the box that draws the pixels at render time)
Region sequence: The path the buckets take when rendering the image. I prefer top to bottom but there are many options.
Frame Stamp: enabling this automatically embeds useful information at the bottom of your image such as V-ray version, filename, frame #, render time etc.
Object Settings: use this to enable or disable Vray features for specific pieces of geometry.
Note: this can also be accessed by selecting geometry, right clicking in the viewport and choosing V-ray properties.
Well that explains almost every important V-ray settings panel.
We hope you learned from this tutorial or found it useful.
Vrender Company 2017
- How to add perspective to architectural projects with digital 3D rendering help - December 24, 2023
- 3D Architectural Walkthrough Animation Services New York - April 24, 2019
- 3D Rendering Services in San Francisco, California - March 12, 2019