Today architecture, design and construction are very closely connected with the use of high technologies, especially 3D modeling. The introduction of the latter has not only allowed embodying the complex ideas, but also greatly to simplify the projects.
3D modeling is often used to create models of various architectural buildings, particularly, cottages. This is not only a great way to see your future house before the start of construction, but also the opportunity to make the necessary changes, to see how this or that supplement will look like, to see the selected layout, materials and more.
The advantages of 3D visualization of cottages
In addition to the above-mentioned benefits of this approach, also the following can be attributed:

visualization definitionwhat is rendervisualization toolsarchitectural concept renderings
1. Precisely modeled object in the three-dimensional space.
2. Demonstration of the house from different angles and with different lighting.
3. Being able to see not only the appearance of the house, but the way it looks among its landscape.
4. Selection of the perfect combination of the exterior of the cottage and its environment.
5. Saving time and money.
6. The ability to make necessary adjustments quickly and timely.
7. It demonstrates both advantages and disadvantages of your cottage.
8. It provides many other unique opportunities for the customer.

island render

In other words, three-dimensional visualization helps you to see the house exactly as it will be. Of course, this approach allows to eliminate the things that you did not like at the initial stages of construction, and, consequently, to save a decent amount of money, because the introduction of changes after the start of work faces severe delay in delivery of the built cottage and the necessity to attract additional funding.
Needless to say that the use of 3D technology has gained immense popularity in the architecture around the world. It is used not only by large companies but also by private organizations. This is not surprising, because any drawing, even executed in the best way with incredible precision, does not give you such a representation of the construction as a 3D model does. Photography is also in many ways inferior to it. Bright and saturated image of the future cottage as the result of 3D visualization will give you the most accurate and true representation of the result of the upcoming construction.

Vrender  Company 2016.

architectural projects rendering

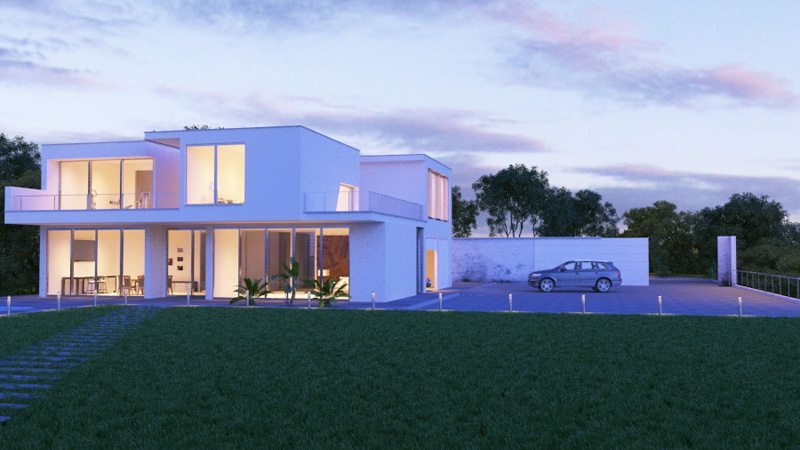
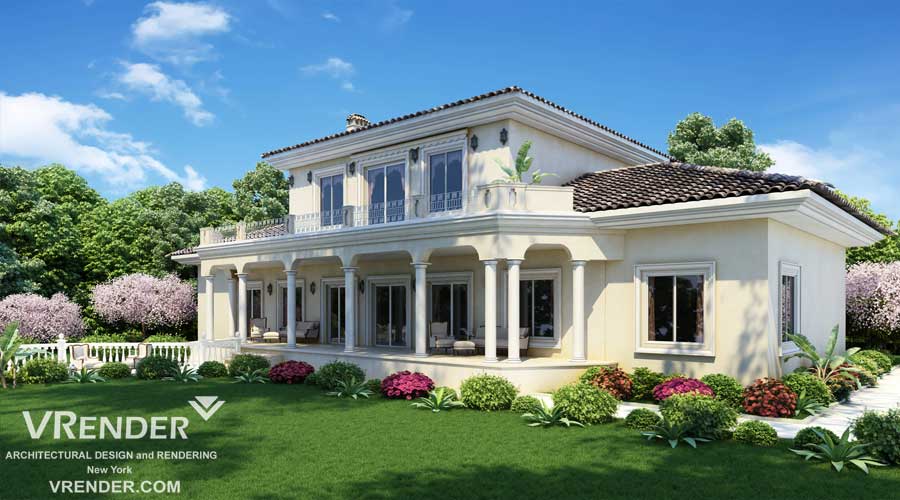
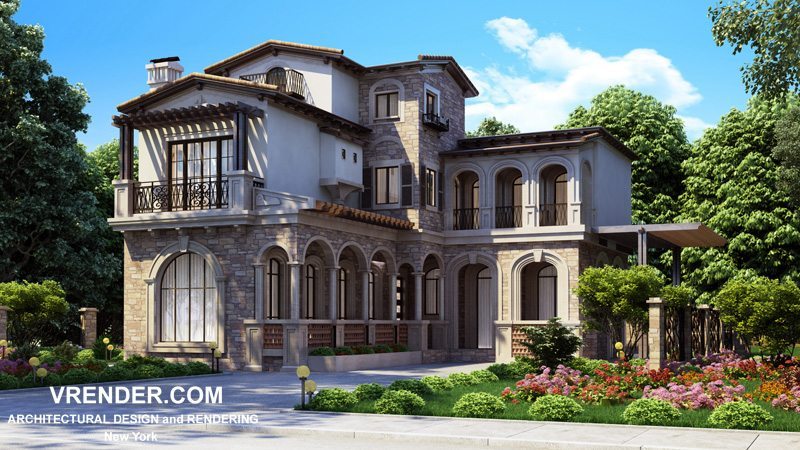
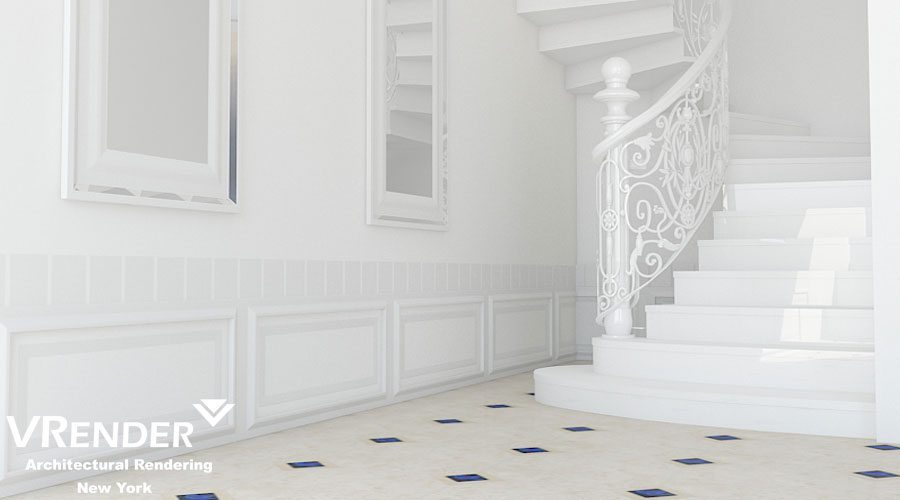
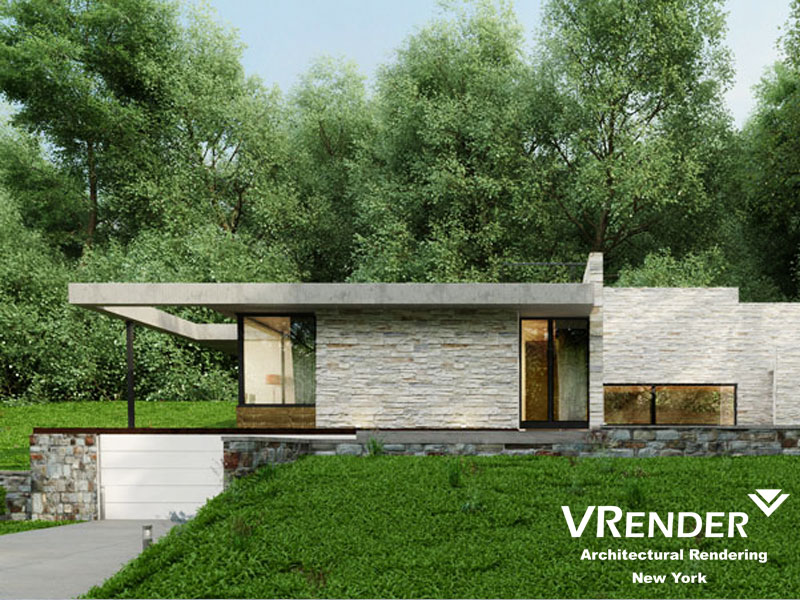
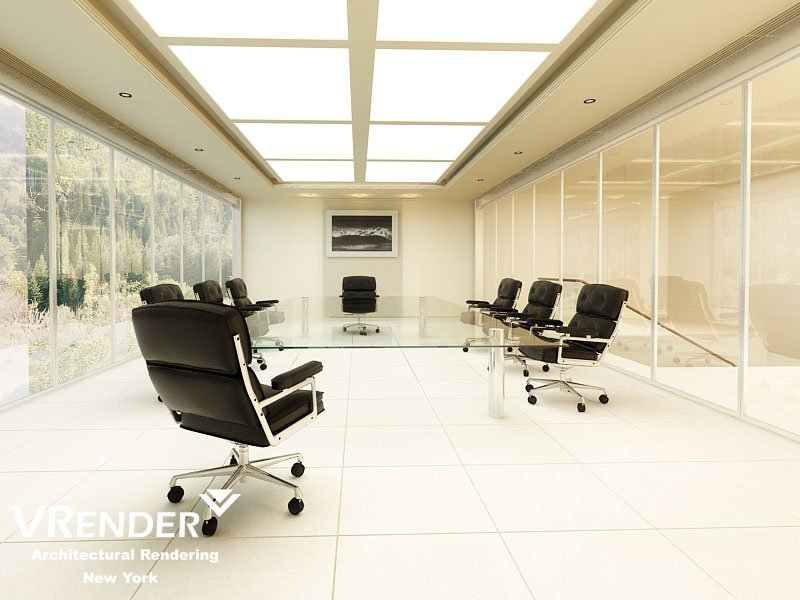
3D architectural visualization is a graphical representation of the object, allowing estimating the future construction.

The presentation of the external features of the planned construction is possible by the demonstration of the project from different angles in photo-realistic graphics.

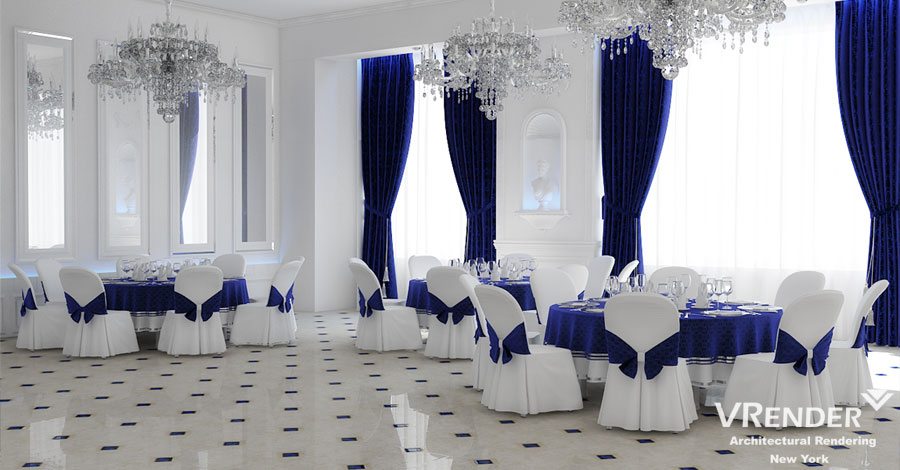
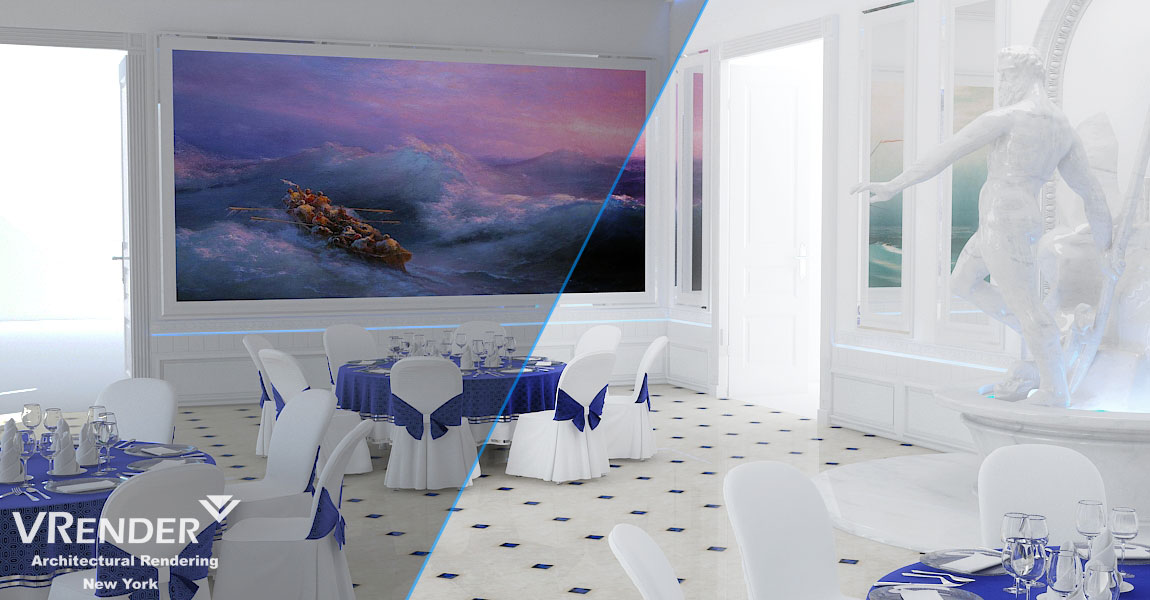
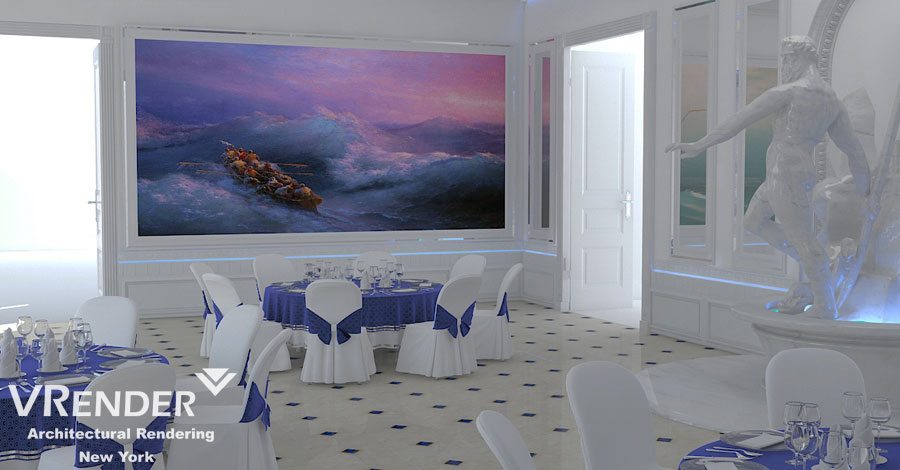
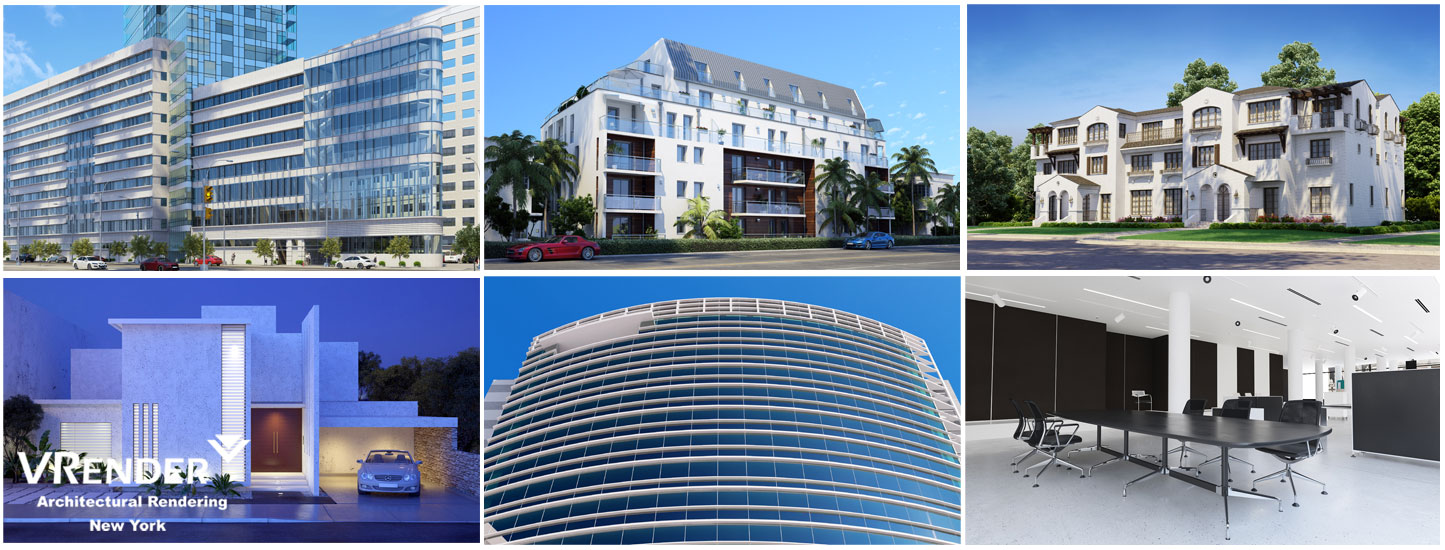
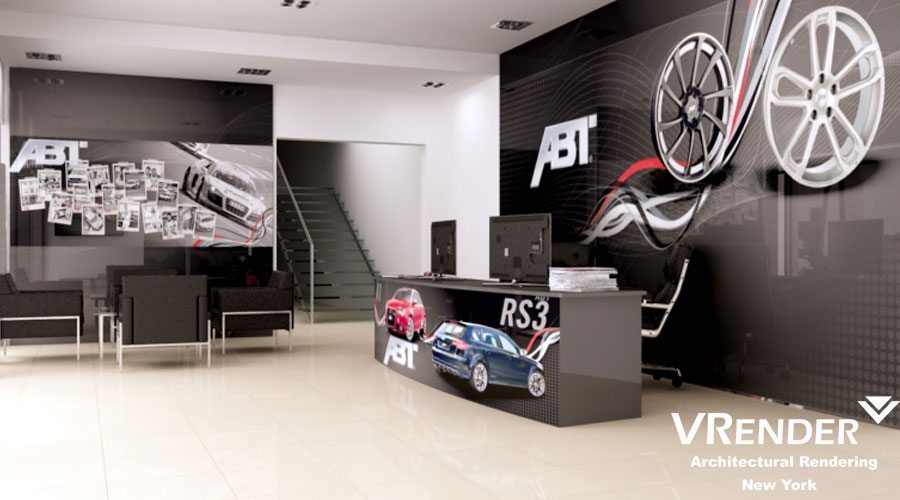
Using photo-realistic images, you can see how your non-existent building or block of buildings will look like externally. Therefore, 3D architectural visualization of projects is a powerful tool for construction companies. It can be easily perceived by both, the consumer and the contractor. Moreover, presenting the object showing the most effective perspective, 3D architectural visualization is an effective method for product promotion, as it helps to attract new investors. The architectural visualization is applied:

• in the creation of video clips,
• in presentations of architectural objects,
• when creating a virtual tour,
• on sites of construction companies.

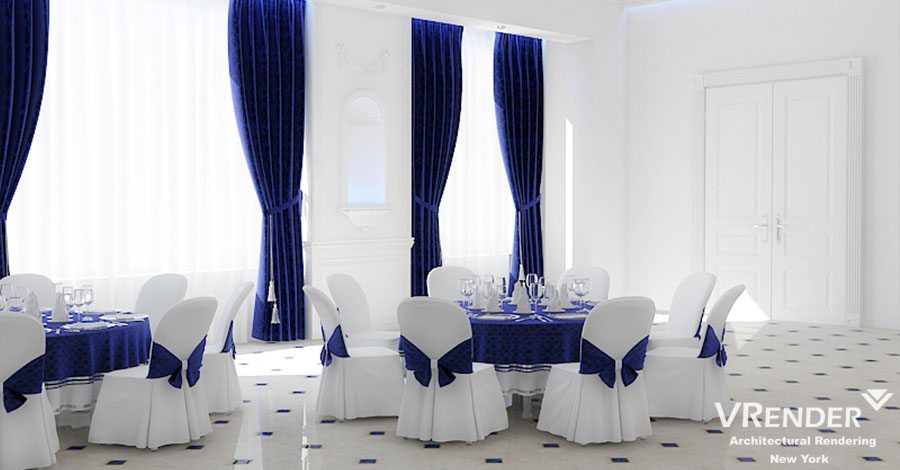
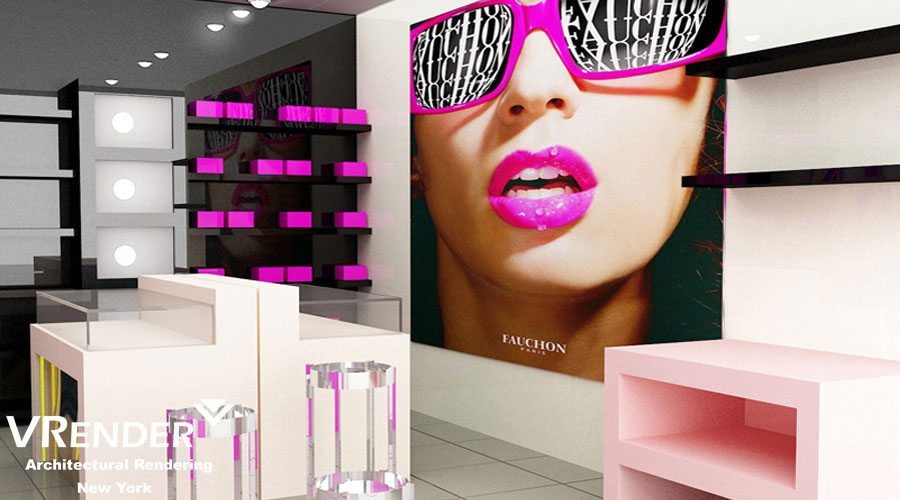
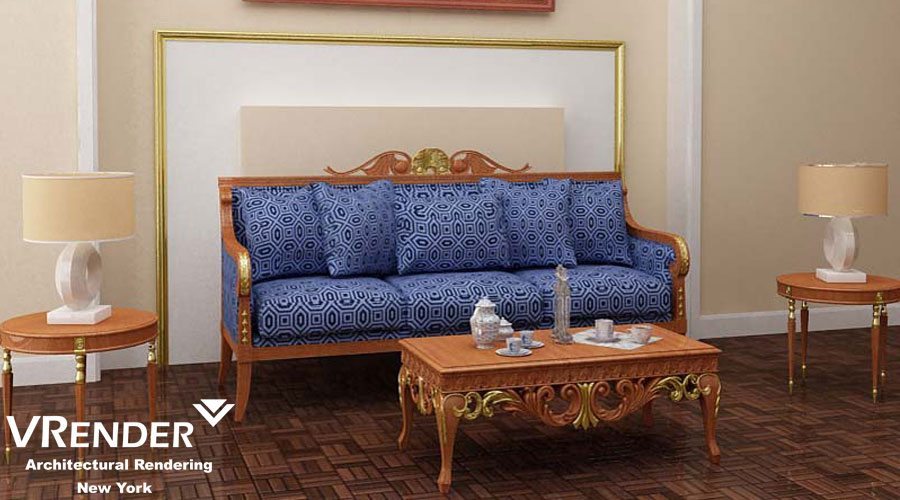
By means of photorealistic images, there is an acquaintance happens with the appearance of the future buildings. Due to this, you can immediately see all the flaws of the project, as well as compliance of the with all objects nearby. Three-dimensional architectural visualization is ordered not only by architects, architectural companies, but also by designers to showcase interior, furniture and so on. It gives the opportunity to advertising agencies to compete on the market, as well as to big construction companies. In addition, the use of 3D technologies is prevalent among individuals who want to make repairs of the outside of their house.

architectural concept renderings

Features of architectural 3D Animation

The aim of 3D architectural Animation is an effective advertising of the object, which provides it fame and trust. This method ensures the creation of the positive image to the advertised project and the formation of the necessary conditions around it. The process of creating three-dimensional architectural animation is more complex than the usual architectural ad with all these flat drawings. The quality of video depends on the right-designed details and correct clipping of the video.

Stages of 3D Animation:

1. Formulation of the storyline of the video.

2. Writing a script for a presentation.

3. Storyboarding the 3D video. Larger frames are drawn at this stage, colors are chosen carefully, graphical components and other composite solutions are defined.

4. Creation of animatics. Animatics is shaping of the future of 3D movie from the usual objects of the scene.

5. Placement of virtual cameras.

6. Creation of lighting.

7. Animating of virtual cameras. The installation plans of 3D movie are created, capturing the motion cameras and other video information. You can change the templates to obtain high-quality image in future, of the scenes and camera’s movements, as well as lighting.

real estate rnderings

Advantages of 3D architectural visualization

Using 3D visualization in architectural projects, you can create a model of any building without the use of a plurality of incomprehensible sketches. Accurately depicting every detail, you can clearly model the image of the house, cottage and other construction. The superiority of this method is as follows:

– the ability to create volumetric models of the project,
– a chance to review all the details of even non-existent project from different angles under different weather conditions, allowing you to determine the presence of defects in the structure or its perfection,
– the ability to see the future project at any time of the day,
– the opportunity to see the objects around the project,
– the ability to calculate the necessary material for the construction fully before starting its construction,
– the ability to create business presentations.

architectural presentation

The benefits of cooperation with Rendering Company

Customers are always satisfied with the results of the visualization made by Vrender. We cooperate with well-known interior designers, as well as major architectural bureaus. Thanks to rigor of each employee, we have won the trust of clients and we are competitive visualization studio at the moment. Cooperation with us has following positive aspects:

– quality 3D visualization of architectural designs, with maximum accuracy and displaying all details,
– the shortest delivery time,
– unique concept of the video,
– application of new technologies,
– we offer the customer the opportunity to immerse themselves fully in the project, with the ability to see every detail closer,
– we have the extensive experience in the field of 3D visualization,
– we guarantee the authenticity and attractiveness of created exterior.

Order the three-dimensional visualization

Our studio has more than 4 years in this field. We have developed distinct quality standards, producing the highest level of architectural 3D rendering all the time. It is required to provide design documentation and drawings to create a 3D visualization of architectural project. Next, we will assess the project and deal on the terms and payment. After that, specialists of architectural visualization studio begin to develop accurate models of future buildings.

© Copyright Vrender.com  2016.

Restaurants render

Cinema 4D or abbreviated C4D by MAXON company is a package for creating three-dimensional graphics and animation.
Cinema 4D is a universal program for creating and editing three-dimensional effects and objects. It allows rendering objects using Gouraud method. It supports high-quality animation and rendering. It stands out thanks to simpler interface than other analogues.

Resorts rendering

With the release of the 12th version, MAXON no longer provides modules for sale. Instead, Cinema 4D is now available only in the six embodiments described below.
In addition to the main program, which contains the basic tools for modeling, texturing, animation and rendering, there are also modules that allow the user to get more specialized tools and functions of the program.

hotel visualization

hotel rendering

• Advanced Render – it is a module that provides advanced capabilities for rendering of the scenes,
• BodyPaint 3D – tools for creating UV’s unwrapping and texture maps (since R10, it is included in the basic package),
• Dynamics – module to simulate the dynamics of hard and soft bodies,
• HAIR – module for creating hair,
• MOCCA – a module designed to work on characters’ animation. It includes a system for simulation of tissues, morphing, various deformers, and much more,
• MoGraph – it is a module designed to generate and animate objects. It is intended for creation of animation design,
• NET Render – a module that allows calculating the animation in the render farm. Starting from its 15th version, this module ceased to exist and was replaced by Team Render system,
• PyroCluster – a tool for creating volumetric effects of smoke, dust, etc… (from the R10 version it has been included in the Advanced Render module),
• Sketch and Toon – a module allowing to create not photo-realistic visualization of the scene,
• Thinking Particles – it is a module that includes nodes system of particles’ control.

© Copyright Vrender.com  2016.

photoshop 3d render post processing

Image Post-Production is what will make our render more colorful and beautiful. I process almost all our works in the end in Photoshop.

Initially, the image looks like this.

render Post Production

Open it in Photoshop and firstly, apply filter to it: Filters -> Sharpen -> Unsharp Mask.

Render Color Correction

Next, you need to copy the Background layer.To do this, simply drag it to the button (marked with red on the picture) Create a new layer in the Layers panel.

render layer

Now we have two layers: Background and Background Copy. So be careful when applying filters, which will be applied to copies. Next, run the command Filter -> Blur -> Gaussian Blur. Set Amount value equal to 3 pixels, and click OK.

In the Layers panel, open the list of blending methods and choose Soft Light method.

Change Opacity Level to 22%

render soft ligth
As you can notice, the picture has already become much juicier, shadows – more expressive, but the image – depending on the colors you use in the interior – became brighter or darker too. Well, we will struggle with this problem a little bit later, because now it is the time to create a slight glow on the highlights.

render production

After smears are over, again press Ctrl + E, to merge the top layer with the bottom.Now it’s time to enhance the brightness.Press Ctrl + M (Curves) or go to Layer Panel- Create new fill or adjustment layer – Add Curves .

You will see a diagonal line in the opened window that can be bent.Depending on what your interior became after the application of mixing the Soft Light, you will need to bend the curve either up or down, holding its middle.Bending up means to brighten the picture, down – darker.How much to bend back and forth – is for you to decide, as it is a matter of taste.After my enhancing the curve of brightness, image became like this:

render curves

rendering color curve

render production ccurves

Press Ctrl + E to merge the top layers

Now we need to highlight the interior with magic light for rejoice of eyes.Again, copy the Background layer, press Ctrl + F, and then apply the Filter -> Distort -> Diffuse Glow.If you want to receive fewer grains in the magical light – decrease the value of Graininess.

highlight the interior

render Distort

render Distort layer

After applying the filter, use the Soft Light blending method, select the Opacity value up to your taste (I have again set the value to 47%).

render blend layer

The penultimate what should or should not be done (a matter of taste) – more clarity. If you lack the clarity of the image, repeat the step described above the Unsharp Mask filter

Press Ctrl + E to merge the top layers

And finally add Hue/Saturation (Main Menu- Choose Layer -> New Adjustment Layer -> Hue/Saturation

render hue saturation level

Final Image

Final Render Color Correction

© Copyright Vrender.com  2016.

three-dimensional design

A 3D design differs from the conventional (static) design with its realism, the ability to look at the object from different angles. There is a wide range of software that makes it possible to create three-dimensional designs. Each program is intended to a certain scope and, therefore, has a different interface and tools.

Popular software to create 3D designs:

• ArCon
• 3D VisiconPro
3DS Max
• Cinema 4D
• Sweet Home 3D
• Softimage 3D Infini-D

three-dimensional graphics

Features of 3DMax

One of the most widespread programs for 3D modeling is 3DMax. The work in this program is a bit like constructing the conventional drawing. On the standard drawing, the object is represented from 3 angles: from the side, top and left. But there is a significant difference in three-dimensional design from the usual drawing. 3DMax can allow not only to see the objects from all sides, but also to change their shapes, location, shade, and so on. This process is reminiscent of an entertaining video game where a player can manipulate with 3D objects.
The effect of “three-dimensionality” is created based on simple shapes: sphere, cube, circle and others. Objects in the program are created using the “polygon grid” tool. It consists of polygons (grid elements). The grid is editable – transformed in width, height, or top. The larger the number of polygons contained in the grid, the more realistic it looks. But at the same time, increasing the complexity and shape of an object and increasing the number of polygons, you are also increasing the time for the image rendering in a program.
Initially, objects in 3DMax look not alive, because natural objects such as a table, a glass of water or a horse – all have natural unevenness, curves, glares, shadows and other elements that give the degree of realism to the final picture.
The program’s interface has the tools to create supportive attributes. One of these is the virtual light sources. They are of two types – omni and direct. With their help, you can illuminate the three-dimensional scene, creating glares, shadows, adjusting their brightness and contrast. The designer adjusts effects to provide a natural look to the picture.

3ds max 3d design service

Scope of the three-dimensional graphics application

The three-dimensional graphics has different directions and scopes of application. 3D graphics is used in the film industry, while creating special effects on television, when making scenery and costumes. Advertising also uses three-dimensional design broadly. Spillover effects have an excellent look when one object turns into another, for example, a black BMW that smoothly transformed into a silhouette of a running panther. Also, 3D effects make commercial sites more beautiful and perfect-looking. Plain packaging of biscuits will shine and sparkle, will have no distortions and will lure a customer with its perfection because this is not an ordinary photo, but a thought-out three-dimensional object, created by professionals.

Three-dimensional design is an integral part of the production of computer games and various multimedia projects, VRML, modeling interiors, furniture and so on.

Three-dimensional design has opened to mankind hitherto unknown possibilities. The customer can see own home, the bedroom’s interior or furniture before the creation process begins, and will be able to make adjustments according to own preferences. 3D model of a house can be viewed from all sides – both inside and outside, all the details can be considered and eventually, the result can be imagined.

Features of 3D visualization in various fields

Today, many different design companies offer their services for the original and stylish design of the entire structure (houses) or its individual parts. Clients were previously offered with huge catalogues of ready designer decisions, from which they could select different stylistic ideas for the interior design of any building.

© Copyright Vrender.com  2016.

Vray tips before you start to learn Vray

Vrender rendering company services1. “Correct” geometry

It is necessary to stick to some rules in the process of modeling in order that your rendering scene took less time and you received better results. Otherwise, you may face a number of challenges like undesirable artifacts in the final image.

Use the smallest possible number of polygons. Every extra polygon increases the file size of the scene, wastes the RAM and video card resources to its display, and requires more time to render the scene.

vray mesh normal

Polygons’ structure must be “correct”. Ideally, all polygons must be squares. This result in following: do not use the standard “boolean” object, because after its application you receive many polygons-triangles with very sharp angle.

There should be no open edges. If the geometry is not closed, i.e., the net contains holes, Vray will take into account the internal space when calculating lighting, which will increase the rendering time. There will also be dark spaces in the grid gaps (shadows).

Polygons must not overlap or coincide with each other, as Vray does not understand which of the polygons are considered basic and should be colored and which must be put on the background. As a result, it mixes colors (materials) of both (all) grounds with an unpredictable result.

vray mesh 3d rendering

If possible, use single objects. Vray more accurately calculates the shadows in places of fracture of grounds if these grounds belong to the same object, and all the vertices are weld.

Convert all the geometry in the editable poly. Get rid of the long hierarchies of modifiers. Each modifier uses memory, and therefore increases the time spent on rendering and calculating the result of the geometry’s change and display of totals and time for rendering.

2. Proper lighting

Always try to use systems of physical lighting, close to the real one, such as Daylight System (system of day lighting), as well as a bunch of VRaySun and VRaySky. Use HDRI to simulate immersion of objects in the environment, as the light sources in interiors use photometric with IES profiles. This will add realism to the scene, as in this case, the actual algorithms for calculating the light information will be used during rendering. Don’t forget about the gamma correction of the image! When gamma is equal to 2.2, colors in 3ds Max will be displayed correctly.

3. Textures

The texture size must correspond to the size of the model on final rendering. Use the textures with higher resolution only if you paint the big picture with a close-up. If the texture is assigned to the small object at the background, it may be small.

If possible, use one texture for different materials, changing its in color and tone as required, in the Output tab.

When using a large number of high-resolution textures, your scene can be very slow and rendered long. In the worst case, Vray can just give up to paint it.

To enhance the realism, Bump maps (with irregularities) and Specular (mirror reflections) must be added to materials, because in reality, each object has its relief and reflectivity. There will not be a problem to create these cards from the original texture – superficial knowledge of Adobe Photoshop will be enough.

4. The scale of the scene

To receive renderings of decent quality, scale units in the scene are of paramount importance. Most often, the work in centimeters is the best solution. This allows not only creating more accurate models, but also helps in calculating the lighting and reflections.

vray render tips

5. Visualization options

To calculate the Indirect Illumination, use a bunch of Irradiance Map + Light Cache. This is much faster than using a bunch of Irradiance Map + Brute Force (set by default). The resulting image is less “noisy” and is painted much faster, if in the light sources of VrayLight type are selected with “Store with Irradiance Map” option.

Good shadow quality can be achieved by setting the number of sub-divs in VRay’s lights settings to 15-25. In addition, always use VRay physical camera, with the help of which you can receive the full control over the presentation of light on the scene.

© Copyright Vrender.com  2016.

Features of 3D Visualization

Not always did the picture in the catalogue correspond to the expectations of the clients and with eventually received results. Some customers were unhappy with what they saw after all the design work had been finished. Today, with the advent of the panoramic photos, as well as the progress of various bulky programs and formats for the transmission of images, many companies have shifted to the virtual catalogues. There they offer to their potential clients to get acquainted with 3D visualization of the interior in bulky format.
3D visualization of the interior gives an excellent opportunity to examine the object in every detail from different angles, as well as to see the entire panorama. Thus, each client will be able to consider the idea of each of the interior styles more accurately which will allow him or her to know what exactly the outcome would be.

trade rendering  retail store rendering

3D visualization of the trade islet or retail store

To demonstrate the construction projects, facilities projects, including information about the architecture solutions and the materials used, architectural visualization is applied. The rendering result is presented in a 3D format in the HD 3k/4k. The client will have a possibility to consider the future project fully at any angle. He’ll receive the entire information about the object at the initial stage.

For example, 3D visualization of the trade islet will allow considering not only the architectural shape of the object but also how the project will look like in its final stage, including the color solution. Architectural visualization is of two kinds – sketch and photo-realistic. Sketch 3D visualization of the store is required at the initial stages of design, to have a common vision of the future construction. And photo realistic rendering is more expensive and improved version of the presentation of the project. 3D visualization of the store is often needed for those who lease space for rent. It will be easier in this way to discuss all the possible layouts of the space with the tenant.

The starting point for the visualization will be:

• projects,
• blueprints,
• preliminary sketches.

The time to create visualization must be from one to five days depending on the complexity of the object. Imaging results are often placed on the websites of construction companies so that customers could understand, whom they will be dealing with. The visualization of the object will allow to develop not only viable finishing option and exterior design, but also to save money. It is much cheaper to choose a high-quality rendering of the object than to remodel elements of the structure, which you didn’t like.

3D visualization of the interior

3d model rendering

3D visualization of the interior is one of the most popular services of many companies of interior design of spaces for various purposes.
Visualization program in this format allows creating projects of architectural design, decoration of individual rooms, and of the entire structure of the space as a whole. Visualization experts also can add to the picture, images, and animations that will allow examining the particular panoramic visualization in more details.

The main objectives of 3D visualization

what is 3d visualization  visit visualisation 3d

visualisation 3d modeling  3d visualizations

Computer graphics, which is intended to represent a particular object in a bulk form with the help of specialized computer programs, is called 3D visualization. Programs of various complexities and orientations (AutoCad, 3D Studio Max, Archi CAD, and others) achieve the reflection of three-dimensional space on a two-dimensional flat surface (screen or paper). A variety of programs allow using 3D visualization for the following purposes:

• modeling of virtual objects and creation of images on their basis;
• visualization of graphics when creating computer games and applicative programs;
• visualization of mechanisms’ models and production parts.

Three-dimensional visualization opens new opportunities in many fields of science, manufacturing, computer graphics and others.

© Copyright Vrender.com  2016.