Posts

Vray 3.0 Interface : Explained

In this tutorial, we go about explaining every single Chaos Group V-ray 3.0 setting in detail. With this tutorial you will have a much great understand of the V-ray rendering engine. Its a great read for beginner and pros alike!

If you are having trouble configuring V-ray, optimizing your V-ray render times, or have a huge scene where the render time is just taking too long, then have a look at this free tutorial :
Lets get started!

Assign Vray Render

If you just received Vray or are new to max, remember you need to set Vray as the current renderer before you can access its settings.
1. Open the render scene dialog box.
2. Expand the Assign Renderer rollout.
3. Click the box for the Production render shown in red.
4. Select Vray from the list.

VRAY Frame Buffer

The Vray frame buffer is a cool feature of Vray. Basically it allows you to render your images in a different window other than the default rendered frame window of 3DS MAX. Also it has some features that the rendered frame window does not.

VRAY Frame Buffer

VRAY Global Switches

Lots of important things here. By checking or un-checking the boxes you can easily enable or disable many of Vray’s key features.
Note: I often use this section to globally control displacement, lighting and the override material.
To assign an override material simply drag a Vray material into the box that says None.

Vray global

VRAY Image Sampler

Here you can choose the type of Image Sampler as well as the type of anti-aliasing filter.
Note: For the most part I use the default settings here (Adaptive Subdivision with area filter)

VRAY Image Sampler

VRAY Caustics

Vray Global Illumination (GI)

This is where all the magic happens. I typically will use the default Irradiance Map (IR Map) for primary bounces and light Cache for secondary bounces.
Notice you also have some options for post processing and GI caustics.

Global Illumination

Vray Irradiance Map (IR MAP)

The IR map is one of the methods VRAY uses to calculate global illumination. You can pick from any of the pre-defined presets or manually enter settings for a custon IR map.
Suggested IR map settings
Test Renders:
Min Rate: -5
Max Rate: -3
HSph subdivs: 30
Interp samples: 25
Production Renders:
High preset is usually good enough for me usually.
Mode: For stills, single frame is fine but for animations, Add to current map or Incremental add to current map works well and speeds up the IR map calculation.
Under options I like to have show calc phase checked just so I can visually see the IR map calculation.
Note: If you plan to not use an IR map in your GI calculation, these settings wil not be available. For example if you have QMC for primary and Light cache for secondary, this rollout will be replace with a QMC settings rollout followed by a LC settings rollout.
VRAY Caustics
Use this area to control the VRAY caustics in your scene.
Caustics In optics, a caustic is the envelope of light rays reflected or refracted by a curved surface or object, or the projection of that envelope of rays on another surface.

VRAY Irradiance Map

light cache

VRAY Environment

This is definitely an important rollout. It your environment is to high it can cause your scene to look washed out. Too low can cause it to look dull. I find that .3 works well in most cases of course that all depends on your scene.
Note: Environment light does not pass though geometry unless the geometry is transparent.
If you want to use HDRI lighting simply drag the V-ray HDRI from the material editor into the open slots (none buttons)

VRAY Environment

Vray Camera

Here you have global control over all the V-ray settings.

vray camera

Vray System

There are lots of useful options in this rollout. For the most part I stick with the default settings.
Notable Settings:
Render region division: changes the bucket size. (the box that draws the pixels at render time)
Region sequence: The path the buckets take when rendering the image. I prefer top to bottom but there are many options.
Frame Stamp: enabling this automatically embeds useful information at the bottom of your image such as V-ray version, filename, frame #, render time etc.
Object Settings: use this to enable or disable Vray features for specific pieces of geometry.
Note: this can also be accessed by selecting geometry, right clicking in the viewport and choosing V-ray properties.

Well that explains almost every important V-ray settings panel.
We hope you learned from this tutorial or found it useful.

Vrender Company 2017

Visualization of Exteriors: 3D Software review

Visualization of the exterior is the process of migration of made drawings and calculations in the three-dimensional graphics. Despite the fact that working with the exterior is easier than with the interior, it requires special knowledge and training. In addition, the specialist must know different software that allows creating 3D models. We provide below the list of the most popular programs that are used to visualize objects and give a brief description of each of them, considering the strengths and weaknesses of each.

architecture portfolio

The most popular today is 3D Studio Max by Autodesk. The program gives the user wide opportunities, an impressive set of tools for work and numerous options to ensure the creation of the highest quality models. A huge number of settings allows to customize the program for your needs, to adapt it for your purposes. This is a professional software package that is ideal for the 3d rendering of models of houses and of other architectural structures.

autodesk 3ds max 2017  autocad 2017

No less interesting program for creating visualizations is AutoCAD. Its strengths are ease of operation, comfort and impressive functionality. Due to these, this software allows the realization of even the most complex projects. In addition, the undoubted advantage of the program is the fact that it can quite independently form all the necessary documentation, while the user is busy developing a 3D model.

However, in addition to the full-fledged programs, users often use various plug-ins in the process of creating a visualization. Most often, they are following modules:

•    VRay (System of rendering and creation of lightweight modifications),
•    Forest Pack Pro (adds additional details in complex scene),
•    RailClone Pro (creation of roads and related small objects).
•    Immediate Entourage (Cutout people, trees and more for use as architectural rendering)
All these plugins have fairly broad functionality and significantly enhance the user experience.

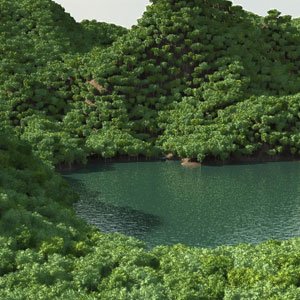
vray 3 for 3ds max  itoo forest pack

Using the above-mentioned ones and other, lesser-known programs, is being created the exterior visualization. This is lengthy process, which time can range from several hours to several weeks. Of course, a huge role is played by the complexity of the project, experience of the user and the software used. Needless to say – the more powerful the computer is, the faster the work on the project goes.

If necessary, the final stage of work on the visualization of the project is the compositing 3d layers details in Photoshop (3d render passes) to give it more realistic look.

Vrender  Company 2016

V-ray Interior Tutorial. Setup Interior Lighting in V-ray

interior using vraysun

The lighting of the interior using VRaySun and VRaySky

We shall consider the option of lighting of the room using VRaySun in this lesson.
You must perform these settings to use the VRaySun interior lighting technique.
The method is convenient because it is possible to create high quality interior lighting relatively fast, as well as to have the effect of falling sunlight.
So, after you have configured V-Ray, we need to add the sun itself to the finished scene. We do it this way:
Create – Lights – Vray – VraySun

lighting of the room

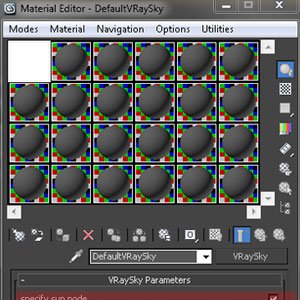
Once the sun was added, we need to agree that VRay adds own VRaySky map on the environment’s map.

add vraysky to editor
We set the angle of inclination of sun optimally, so it would shine nicely in our room. By the way, the rays color depends on the angle of the sun. The closer the sun is to the horizon, the redder light from the sun will be.

vray sun setup

Once we have set the angle of inclination of the sun, we need to perform the following operation: to open the Environment window as it is shown on the following screenshot, where we can see that the environment map is set as VraySky.

environment map is set as VraySun

VraySun lighting consists of two components: Sun and Sky. Now we have to separate these 2 components and to manage them separately from each other. That will allow us to adjust the room lighting correctly to your liking, as well as the brightness of daylight and the intensity of the sun’s rays. To do this, we open the materials panel, and drag the VraySky lighting map there. After this, we are able to change the settings of daylight. Be sure to selects Instance copy type when you copying. Otherwise, we would have to change the settings without this parameter. But they will not be applied, as we do not do duplicate, but make a separate copy of our VraySky.
We do this it this way:

setup interior lighting

Next, we need to turn on the Manual Sun Node parameter.

manual sun node
This turning on will separate the management between sun and sky.
Further, in the Sun Intensity multiplier parameter, we adjust the desirable value. It can be different for each scene, but usually this parameter is not greater than 0.1. It is best to choose it according to your situation.

Once we set up the sky, you can do a couple of trial renders to adjust the brightness of the lighting. After setting up the optimal lighting of the room, you can correct the parameters of the falling sun rays. Sometimes they are either dim or too bright, leaving a white spot. This can be adjusted in the sun setting, changing the brightness, by shifting the settings of Intensity multiplier parameter.

configured v-ray

Then you can do a couple of test renders to configure the optimal lighting of the room.
Sometimes the sky gives a blue tint, and colors the room in blue. It is possible to correct it by decreasing parameter’s value in render settings. The lower the Saturation (Rendering-Render Setup- Indirect Illumination Settings – Saturation) value will be – the less the sky affects the color of lighting in the room, but also the less objects located in the room affect it, so do not do this option’s value too small.

Add VRayLight (Create – Light – Vray- VRayLight) behind the windows with the following parameters

vraysun lighting consists

V-ray Indirect Illumination Settings

environment map

After all the settings are applied, you can receive something like this:

interior tutorial final

After Photoshop Post Production

Photoshop Post Production render

Vrender rendering company servicesDownload V-ray Interior Scene Tutorial Example

Vrender  Company 2016.

This multifaceted 3D graphical design in its modern conception

It is very difficult to localize correctly a product or service in the modern advertising world so that a client will notice them and make choice to your credit. In this case, a professionally done 3D graphical design will allow using maximum of feasible visualization tools, which can create a harmonious and effectively presentable picture for a customer. Sometimes it is necessary to use computer design for target audience formation of product’s image.

The «graphical design» concept involves artistically specified process for various visual objects creation at a special problem-solving environment, but different options of modern computer technologies open the wider scope of activities.

3d-design

Every creative process which is connected with product design begins from essential model reproduction, whose physical properties can be altered by using diverse composition techniques and facilities as effects of light and shade, color depth, texture and constitutive laws of air, line and work of visual perspectives. It gives the balance of advantage to three-dimensional computer graphics on raster scan and vector art.

Each image or object created this way placed into indoor scene or future natural environment where they are free to move in this virtual space on planned trajectories. Utilization of 3D house or project rendering powerful tools provides an opportunity to scrutinize the object at any angle of sight and modify conditions by the means of transmitter-specific commands.


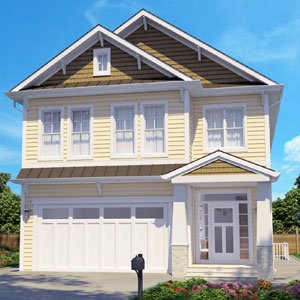
3d house rendering

For description of the process of model’s physical changes and its sphere of positioning such concept as «rendering» is used. It discloses many-sided benefits of visualization of object. With the help of special software, it is possible to set a viewer’s location, change lighting and perspective, put a texture on material composition, etc.

We can exploit an opportunity of 3D graphic design during advertising clips creation, product wrapping, websites, logotypes and general corporate style of companies’ development. Most companies providing corresponding services geared to leading American technologies and the ways of efficient use of software capabilities.


Pages

Rendering Blog

Contact Vrender