Architectural Rendering Tutorials, 3D Visualization Tutorials

Best 3d rendering software in 2019 (free / commercial)

V-Ray (CPU/GPU)

The main rendering software for Architectural Visualization is focused on a wide range of tasks. In order to achieve maximum realism, special attention is paid to lighting. The V-Ray renderer has a number of add-ons for this:

  • Irradiance и Photon Map;
  • Light Cache;
  • Brute Force.

Corona Renderer

Mental-ray

3Ds Max default Render

The main advantage of the render in achieving the expansion of its functionality.

The enclosed library of materials is not standard and requires adaptation in each individual case.

Arnold Renderer | Autodesk

Arnold is an unbiased, physically based, advanced Monte Carlo ray tracing 3D renderer.

OTOY Octane Render

Octane Render is an unbiased real-time GPU rendering application.

Redshift Render

https://www.redshift3d.com/

Redshift is an award-winning, fast, production-ready GPU renderer.

FinalRender

The system is based on ray tracing. It allows you to create effects that were not available in earlier versions, built on the principle of linear processing. The big advantage is to achieve full integration into the necessary software products.

Rendering with Unreal Engine 4 (CPU / GPU)

Vrender Company 2019.


Top free websites with 3d models for rendering and animation in 2019

Top free websites with 3d models for rendering and animation in 2019 (updated)

01. Turbo Squid

02. 3 Delicious

03. 3D Total

04. Free 3D Models

05. Archive 3d

06. Sketch up

07. 3D Model Free

08. 3D Xtras

09. DLegend

10. Artist-3d

11. Nasa 3d Resources

12. 3D M3

13. Dewantoro Network

14. CG India

15. DD Freebies

16. Exchange 3D

17. Corporate Media News

18. Wire Case

19. Mr Cad

20. ShareCG

21. Archibase

22. Top 3D Models

23. CG-Files

24. Top3D

25. Oyonale

26. DMI Car 3D Models

27. Infinitee-Designs

28. Telias

29. Sci-Fi 3D

30. 3DAllusions

31. 3DVia

32. 3d Nucleus

33. 3d Export

Vrender Company 2019

Best-3d-rendering-software-in-2019

Best 3d rendering software in 2019 (free / commercial)

V-Ray (CPU/GPU) The main rendering software for Architectural…
free-3d-models-for-rendering-and-animation-in-2019

Top free websites with 3d models for rendering and animation in 2019

Top free websites with 3d models for rendering and animation…
high-resolution-textures-for-your-projects

Top websites with high resolution textures for your projects 2019

Top websites with high-resolution textures for your 3D proje…
Best-Free-materials-and-shaders-libraries-for-Arnold-Vray-Corona-Renderer

Free materials libraries for Arnold, V-ray, Corona Renderer, Renderman, Octane 2019

Best Free materials and shaders libraries for Arnold, V-ray,…
CAD-Drafting-and-Design-Technology

Service Rendered Meaning-Different types of CAD and Rendering CG Assistance

Service Rendered Meaning - Architectural CAD and Rendering Quick…
Vray 3 settings

Vray 3.0 Interface : Explained

In this tutorial, we go about explaining every single Chaos Group…
ue4 architectural rendering

UE4 Palm Project Settings

Unreal Engine SkyLight Settings Unreal Engine Light…

Top websites with high resolution textures for your projects 2019

Top websites with high-resolution textures for your 3D projects

https://www.textures.com/

https://texture.ninja/

https://www.sketchuptexture.com/


Best-3d-rendering-software-in-2019

Best 3d rendering software in 2019 (free / commercial)

V-Ray (CPU/GPU) The main rendering software for Architectural…
free-3d-models-for-rendering-and-animation-in-2019

Top free websites with 3d models for rendering and animation in 2019

Top free websites with 3d models for rendering and animation…
high-resolution-textures-for-your-projects

Top websites with high resolution textures for your projects 2019

Top websites with high-resolution textures for your 3D proje…
Best-Free-materials-and-shaders-libraries-for-Arnold-Vray-Corona-Renderer

Free materials libraries for Arnold, V-ray, Corona Renderer, Renderman, Octane 2019

Best Free materials and shaders libraries for Arnold, V-ray,…
CAD-Drafting-and-Design-Technology

Service Rendered Meaning-Different types of CAD and Rendering CG Assistance

Service Rendered Meaning - Architectural CAD and Rendering Quick…
Vray 3 settings

Vray 3.0 Interface : Explained

In this tutorial, we go about explaining every single Chaos Group…
ue4 architectural rendering

UE4 Palm Project Settings

Unreal Engine SkyLight Settings Unreal Engine Light…


Free materials libraries for Arnold, V-ray, Corona Renderer, Renderman, Octane 2019

Best Free materials and shaders libraries for Arnold, V-ray, Corona Renderer, Renderman, Octane 2019

V-ray

http://www.vray-materials.de/

http://www.vraymaterials.co.uk/products/vray-materials/

Corona Renderer

https://corona-renderer.com/resources/materials/

Arnold

https://support.solidangle.com/display/AFMUG/Material+Library

Renderman

https://community.renderman.pixar.com/article/653/the-big-renderman-library.html

https://www.creativecrash.com/renderman/downloads/shaders/c/ris100-material-library–2

Octane

https://www.behance.net/gallery/40203697/FREEBIE-SMALL-OCTANE-MATERIAL-LIBRARY

http://3dxyz.pro/octane-mega-bundle/

http://www.silverwing-vfx.de/free_stuff.html

Vrender Company 2019


Best-3d-rendering-software-in-2019

Best 3d rendering software in 2019 (free / commercial)

V-Ray (CPU/GPU) The main rendering software for Architectural…
free-3d-models-for-rendering-and-animation-in-2019

Top free websites with 3d models for rendering and animation in 2019

Top free websites with 3d models for rendering and animation…
high-resolution-textures-for-your-projects

Top websites with high resolution textures for your projects 2019

Top websites with high-resolution textures for your 3D proje…
Best-Free-materials-and-shaders-libraries-for-Arnold-Vray-Corona-Renderer

Free materials libraries for Arnold, V-ray, Corona Renderer, Renderman, Octane 2019

Best Free materials and shaders libraries for Arnold, V-ray,…
CAD-Drafting-and-Design-Technology

Service Rendered Meaning-Different types of CAD and Rendering CG Assistance

Service Rendered Meaning - Architectural CAD and Rendering Quick…
Vray 3 settings

Vray 3.0 Interface : Explained

In this tutorial, we go about explaining every single Chaos Group…
ue4 architectural rendering

UE4 Palm Project Settings

Unreal Engine SkyLight Settings Unreal Engine Light…

Service Rendered Meaning-Different types of CAD and Rendering CG Assistance

Service Rendered Meaning – Architectural CAD and Rendering Quick CGI Assistance are essentially used to setup exterior and interior the perception of various building types like Residential, Commercial, Institutional, Hotels, Restaurants and academic Institutions.

The primary kinds of Architectural services that may be presented to customers are the following:

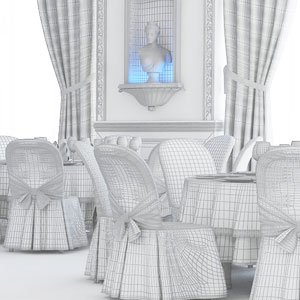
3D Architectural Modeling – is the procedure of creating a mathematical, wireframe representation associated with a 3-dimensional object. With the aid of 3D rendering services, these 3 D models can be shown to be an image in publications. The made 3-dimensional models are extremely significant because they have real elements like shadows, sunlight effects and many more. Photorealistic effects result in the images looks realistic and therefore are frequently utilized by designers / visualize to consequently giving their customers.

What is CAD Drafting

3 dimensional Architectural Modeling

3D Architectural Rendering – is the procedure that industrial designers use to visualize their ideas by creating 3D images using CAD Software. 3D rendering in means creating a photo-realistic picture of commercial and residential structures. The entire process of rendering is very much like photography or cinematography since it works well for lighting and staging moments and creating images. Unlike regular photography, however, the moments being captured pics of are imaginary, and everything showing up in 3-dimensional rendering must be produced (or reproduced) on the PC prior to it being made.

3 dimensional Architectural Rendering

3 dimensional FlythroughArchitectural Animation – is the procedure to produce a fast, effective and economical communication media for those. It may also help to produce live animations JPEG files that may be distributed to the clients around the world. Additionally, to supplying a view from the position getting a photograph-realistic dimension to build or perhaps idealized spaces, walk-through could be produced using the actual materials for use, for example- interior lighting, landscape designs, natural lighting and moving objects.

Flythrough – enabling customers to see one of the suggested or actual sites as though these were within it and moving through it.

Walk-through a stroll through providing an obvious idea to create and visualize you’re building to be built and makes a person seem like entering that specific building or virtual space.

Interior Rendering – help plays any inside advantage. With the assistance of it, it’s possible to add, remove or modify lighting, furniture, furnishings, wood paneling, wallpapers, wall textures along with other particulars for just about any residential in addition to commercial structures. Photorealistic interior models could be produced with the precise rendering of methods the inside of the building would look when the construction is finished.

3 dimensional Architectural Animation

Architectural CAD Services

Exterior Rendering – rendering is a vital beginning reason for imagining assembling your shed. It will help to portray the key particulars of color hues, light intensity, light reflection, and shadows developing an existence like a portrayal of the building. Also, with the aid of the three D Exterior Rendering services a variety of particulars like atmosphere rendering, including landscape designs, trees, hedges, fences, automobiles, streets and also the neighborhood generally could be imagined included in the project’s final rendering.

Vrender Company 2017

Vray 3.0 Interface : Explained

In this tutorial, we go about explaining every single Chaos Group V-ray 3.0 setting in detail. With this tutorial you will have a much great understand of the V-ray rendering engine. Its a great read for beginner and pros alike!

If you are having trouble configuring V-ray, optimizing your V-ray render times, or have a huge scene where the render time is just taking too long, then have a look at this free tutorial :
Lets get started!

Assign Vray Render

If you just received Vray or are new to max, remember you need to set Vray as the current renderer before you can access its settings.
1. Open the render scene dialog box.
2. Expand the Assign Renderer rollout.
3. Click the box for the Production render shown in red.
4. Select Vray from the list.

VRAY Frame Buffer

The Vray frame buffer is a cool feature of Vray. Basically it allows you to render your images in a different window other than the default rendered frame window of 3DS MAX. Also it has some features that the rendered frame window does not.

VRAY Frame Buffer

VRAY Global Switches

Lots of important things here. By checking or un-checking the boxes you can easily enable or disable many of Vray’s key features.
Note: I often use this section to globally control displacement, lighting and the override material.
To assign an override material simply drag a Vray material into the box that says None.

Vray global

VRAY Image Sampler

Here you can choose the type of Image Sampler as well as the type of anti-aliasing filter.
Note: For the most part I use the default settings here (Adaptive Subdivision with area filter)

VRAY Image Sampler

VRAY Caustics

Vray Global Illumination (GI)

This is where all the magic happens. I typically will use the default Irradiance Map (IR Map) for primary bounces and light Cache for secondary bounces.
Notice you also have some options for post processing and GI caustics.

Global Illumination

Vray Irradiance Map (IR MAP)

The IR map is one of the methods VRAY uses to calculate global illumination. You can pick from any of the pre-defined presets or manually enter settings for a custon IR map.
Suggested IR map settings
Test Renders:
Min Rate: -5
Max Rate: -3
HSph subdivs: 30
Interp samples: 25
Production Renders:
High preset is usually good enough for me usually.
Mode: For stills, single frame is fine but for animations, Add to current map or Incremental add to current map works well and speeds up the IR map calculation.
Under options I like to have show calc phase checked just so I can visually see the IR map calculation.
Note: If you plan to not use an IR map in your GI calculation, these settings wil not be available. For example if you have QMC for primary and Light cache for secondary, this rollout will be replace with a QMC settings rollout followed by a LC settings rollout.
VRAY Caustics
Use this area to control the VRAY caustics in your scene.
Caustics In optics, a caustic is the envelope of light rays reflected or refracted by a curved surface or object, or the projection of that envelope of rays on another surface.

VRAY Irradiance Map

light cache

VRAY Environment

This is definitely an important rollout. It your environment is to high it can cause your scene to look washed out. Too low can cause it to look dull. I find that .3 works well in most cases of course that all depends on your scene.
Note: Environment light does not pass though geometry unless the geometry is transparent.
If you want to use HDRI lighting simply drag the V-ray HDRI from the material editor into the open slots (none buttons)

VRAY Environment

Vray Camera

Here you have global control over all the V-ray settings.

vray camera

Vray System

There are lots of useful options in this rollout. For the most part I stick with the default settings.
Notable Settings:
Render region division: changes the bucket size. (the box that draws the pixels at render time)
Region sequence: The path the buckets take when rendering the image. I prefer top to bottom but there are many options.
Frame Stamp: enabling this automatically embeds useful information at the bottom of your image such as V-ray version, filename, frame #, render time etc.
Object Settings: use this to enable or disable Vray features for specific pieces of geometry.
Note: this can also be accessed by selecting geometry, right clicking in the viewport and choosing V-ray properties.

Well that explains almost every important V-ray settings panel.
We hope you learned from this tutorial or found it useful.

Vrender Company 2017

UE4 Palm Project Settings

unreal engine project settings

Unreal Engine SkyLight Settings

Unreal Engine Light Source Settings

Atmospheric Fog

ue4 ocean system settings

Weather & Ocean Water Shader Settings


Ocean System ue4


Precision in 3D modeling is the key to success in the world of CG

People say that if you’re smart at painting, you’ve got higher probabilities of changing into associate professional 3D modeller. Actually, neither will such an announcement be dominated out utterly nor will its accepted readily! To be precise on this, 3D modeling demands compendious plan on lightings, shadow effects, texturing and anatomy. Since its believed that painters have higher understanding of those aspects, common notion is that they create smart multimedia system modelers. however if you’re inquisitive about this profession, you’ll reach excellence too with four killer tips. Check them out!

Precision in 3D modeling

1. Following the sting loops

You cannot attain exactitude in work unless you’ve got a suggestion. Therefore, the primary killer tip is to rate upon edge loops. once you change this selection in your 3D modeling package, it’ll produce a mesh with variety of points over your raw model. currently you wish to pick the relevant points and weld, squeeze out or multiply them as per the stress of the project. For your info, edge loop helps achieve higher pure mathematics in 3D image modeling. Say for example, you wish to realize that characteristic pucker of lips of your CG image. Edge loops can return handy.

2. Adding the correct textures

Next tip is that experiment with the textures gift in texturing package to pick the one that matches the requirements of your project. take care to use flat surface shader and defer diffuse shading, as an alternative you may neer be ready to perceive the particular impact of every of the texturing! create it a degree to save lots of the constant quantity knowledge of every of the texturing effects in order that you’ll finally decide upon the one which will do justice along with your project.

3D modeller

3. Lighting ought to be correct

The most crucial of the killer tips shared here is lighting. once you implement the correct lighting effects, you’ll create your CG project look outstanding. Likewise, overdoing it will create the foremost complicated and most artistically created 3D image look dull! therefore, a killer tip on lighting is to use the integrated impact HDR dome lighting with spot lights for 3D pictures. however keep in mind to stay to the standard parameters of HDR lighting. Also, keep in mind to show on the incandescent impact in order that the reflections of sunshine on your CG image look realistic.

3D modeling demands

4. Take a look at the shaders

You can solely make sure that your multimedia system project can look extremely skilled once the shader channels of your 3D package work properly. A killer tip (to take a look at|to check its )to travel for perennial test renderings of the file. just in case your standalone pc cannot support perennial renderings, you want to not debate concerning choosing remote render service. this can be as a result of as there should not be any compromise on the standard of the computer file.

Precision in 3D modeling is that the key to success within the world of CG. Take a look at rendering helps achieve accuracy in work. Once standalone PC fails to conduct perennial renderings, what comes handy is remote render service.

Vrender Company 2017.

What is HDRI?

This article describes the basic concepts and the necessary equipment to create own HDRI.
The second part will be provided in the upcoming days and will describe step-by-step instructions on how to create the HDRI.

The concept of HDRI

A theory comes first. HDRI is a panoramic photo, which covers all angles from a single point and contains a large amount of data (usually 32 bits per pixel per channel), which can be used for the illumination of CG scene.

hdri tutorial

A simple 3D scene, which was lighted only with HDRI:

The easiest way to light a scene in the CG is the use of HDRI. Creating high-quality HDRI from scratch is a difficult task that requires very specific equipment and meticulous attitude to the entire process. One mistake will result in overdo. For example, the use of an incorrect focal distance or a slow shutter speed.
HDRI means High Dynamic Range Image. “Dynamic range” is the amount of data about the brightness of the image; such data is the much larger amount of the information than the human eye is able to catch. I call the most part of the photos and pictures as LDR images or pictures with a low dynamic range. They store 8 bits of data for each of the red, green, and blue channels for each pixel. An example of LDR image is a JPG file. The problem with the LDR image that it is limited to a relatively small range of luminance values from 0 to 255, which is insufficient for the illumination in 3D. Therefore, you need to choose the HDR format.

All we need to do is play with the brightness to illustrate the difference between JPG and HDR file

hdri tutorial 3ds max

As you can see, JPG on the left has absolutely no details in the bright areas. The entire rectangle is a solid color. This is because the maximum brightness of the pixel in the JPG image is 255. The maximum brightness in HDRI is practically infinite that simulates the fluorescent lamps, so they remain visible even if the image is darkened. HDR file retains the brightness of bulb correctly. It knows that the lamp’s light is much brighter than the rectangular area around it, but it is only one solid color in the JPG’s version. This means that when you use the image to light up the 3D scenes, the lamp will emit more light.

Here’s a simple scene, illuminated by a JPG and HDRI:

original hdri ligth  original sky ligth
As you can see, JPG gives flat and unrealistic lighting, while HDRI gives good sharp shadows and lots of juicy contrast, as from the bright fluorescent lights.
The difference is even more apparent when we use an example that has even more bright light source like the sun:

sky hdri map  hdri sky map

You can see in the chrome ball on the back side of that JPG and HDRI appear to be identical, but the light they create is totally different due to the fact that the HDR file stores the correct brightness of the sun and JPG is limited to a range of up to 255 colors, which is too low to provide enough lighting.
You also need to debunk the myth with the understanding of HDR pictures.

HDR photo, not the HDRI map

HDR is a type of image that is best described as ‘tonal image.’ The idea is to take a few photos with different exposures, and put them together so that all of the images are properly displayed in terms of brightness (not too bright and not too dark). For example, the sky is usually much brighter than the rest of the image; therefore toning program will choose to use a darker exposure for the sky and a brighter exposure for the rest of the scene to balance it. The result is an 8-bit image, where you can see many details that may be lost in conventional photography.
The process is very similar to how you would do HDRI – you’re doing a bunch of photos with different exposures, and glue them together into one image later. The difference is that the tonal image’s goal is to make conventional JPG, which looks more detailed while with HDRI – is to make a 32-bit image, which stores many data about the brightness (and hence gives a realistic light in the 3D scene).
True HDRI will be in a format that can contain many data (HDR/EXR/TIFF). It will look just like any other image, until you adjust the exposure, and discover that it secretly stores much more vivid colors than you could see before.

a few lessons on setup HDRI lighting in 3DS Max and V-ray

Vray HDRI tutorial in 3ds Max

Studio lighting with HDRI

Download V- ray HDRI Scene with settings

Vrender  Company 2016.

V-ray Interior Tutorial. Setup Interior Lighting in V-ray

interior using vraysun

The lighting of the interior using VRaySun and VRaySky

We shall consider the option of lighting of the room using VRaySun in this lesson.
You must perform these settings to use the VRaySun interior lighting technique.
The method is convenient because it is possible to create high quality interior lighting relatively fast, as well as to have the effect of falling sunlight.
So, after you have configured V-Ray, we need to add the sun itself to the finished scene. We do it this way:
Create – Lights – Vray – VraySun

lighting of the room

Once the sun was added, we need to agree that VRay adds own VRaySky map on the environment’s map.

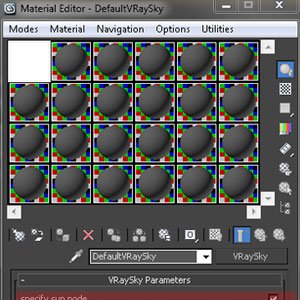
add vraysky to editor
We set the angle of inclination of sun optimally, so it would shine nicely in our room. By the way, the rays color depends on the angle of the sun. The closer the sun is to the horizon, the redder light from the sun will be.

vray sun setup

Once we have set the angle of inclination of the sun, we need to perform the following operation: to open the Environment window as it is shown on the following screenshot, where we can see that the environment map is set as VraySky.

environment map is set as VraySun

VraySun lighting consists of two components: Sun and Sky. Now we have to separate these 2 components and to manage them separately from each other. That will allow us to adjust the room lighting correctly to your liking, as well as the brightness of daylight and the intensity of the sun’s rays. To do this, we open the materials panel, and drag the VraySky lighting map there. After this, we are able to change the settings of daylight. Be sure to selects Instance copy type when you copying. Otherwise, we would have to change the settings without this parameter. But they will not be applied, as we do not do duplicate, but make a separate copy of our VraySky.
We do this it this way:

setup interior lighting

Next, we need to turn on the Manual Sun Node parameter.

manual sun node
This turning on will separate the management between sun and sky.
Further, in the Sun Intensity multiplier parameter, we adjust the desirable value. It can be different for each scene, but usually this parameter is not greater than 0.1. It is best to choose it according to your situation.

Once we set up the sky, you can do a couple of trial renders to adjust the brightness of the lighting. After setting up the optimal lighting of the room, you can correct the parameters of the falling sun rays. Sometimes they are either dim or too bright, leaving a white spot. This can be adjusted in the sun setting, changing the brightness, by shifting the settings of Intensity multiplier parameter.

configured v-ray

Then you can do a couple of test renders to configure the optimal lighting of the room.
Sometimes the sky gives a blue tint, and colors the room in blue. It is possible to correct it by decreasing parameter’s value in render settings. The lower the Saturation (Rendering-Render Setup- Indirect Illumination Settings – Saturation) value will be – the less the sky affects the color of lighting in the room, but also the less objects located in the room affect it, so do not do this option’s value too small.

Add VRayLight (Create – Light – Vray- VRayLight) behind the windows with the following parameters

vraysun lighting consists

V-ray Indirect Illumination Settings

environment map

After all the settings are applied, you can receive something like this:

interior tutorial final

After Photoshop Post Production

Photoshop Post Production render

Vrender rendering company servicesDownload V-ray Interior Scene Tutorial Example

Vrender  Company 2016.